A single handful of worm castings contains more beneficial biology than an entire bag of synthetic fertilizer — and your cannabis plants know the difference. Worm castings for cannabis growing have moved from old-school gardening secret to mainstream organic essential, yet most guides barely scratch the surface. In over 15 years of cannabis cultivation, we've found that no single amendment delivers as much value per dollar as quality vermicompost. This guide gives worm castings cannabis growers the standalone, step-by-step treatment the topic deserves: mix ratios, top-dress protocols, homemade AACT tea recipes, worm bin setup, and how castings supercharge living soil from seed to harvest.
What Makes Worm Castings Biologically Special for Cannabis
Worm castings are biologically special because they deliver slow-release macro and micronutrients, plant growth hormones, humic acids, and a dense population of beneficial microbes — all in a form that will never burn cannabis roots, even at full strength.
When Eisenia fetida (red wigglers) or Eisenia hortensis (European nightcrawlers) consume organic matter, their gut acts as a living bioreactor. The digestive process breaks complex compounds into plant-available forms while inoculating the material with beneficial bacteria, protozoa, and fungi. The finished castings — also called vermicast — emerge as a dark, crumbly, earthy-smelling material fundamentally different from standard compost.
Research from Ohio State University, Cornell University, UC Davis, and the Australian CSIRO has demonstrated that vermicompost improves flower size, bloom quantity, and overall plant vigor. Cornell's studies specifically found that castings not only improve yield but help protect plants from pests, as referenced by Inch by Inch AZ Worm Castings' research summary.
The Biology Inside Every Handful
- Humic and fulvic acids — chelate nutrients and increase root uptake efficiency by improving cation exchange capacity (CEC)
- Beneficial bacteria — populations of Bacillus, Pseudomonas, and other plant-growth-promoting rhizobacteria (PGPR) colonize the root zone
- Plant growth hormones — naturally occurring cytokinins, auxins, and gibberellins stimulate root development and cell division
- Enzymes — phosphatase and urease make locked-up phosphorus and nitrogen available to roots
- Chitinase — this enzyme, produced by microbes in castings, research suggests may help break down chitin in pest exoskeletons, contributing to natural pest suppression
Research from Ohio State's Soil Ecology Laboratory suggests that vermicompost can contain 10–20 times the microbial activity of standard thermophilic compost. This biological density is what makes earthworm castings cannabis plants respond to so dramatically — it's not just nutrients, it's a living ecosystem in every scoop.
Nutrient Profile Breakdown
Worm castings typically test at a mild NPK of roughly 1-0-0 to 2-1-1, but their true power lies beyond the numbers. The slow-release nature means nutrients feed plants for weeks, not days. Micronutrients like calcium, magnesium, iron, zinc, and manganese are present in chelated, plant-ready forms.
Growing tip: Use our nutrient calculator alongside worm casting amendments to track your total NPK input. Castings provide a gentle baseline — you may still want supplemental phosphorus and potassium during peak flowering.
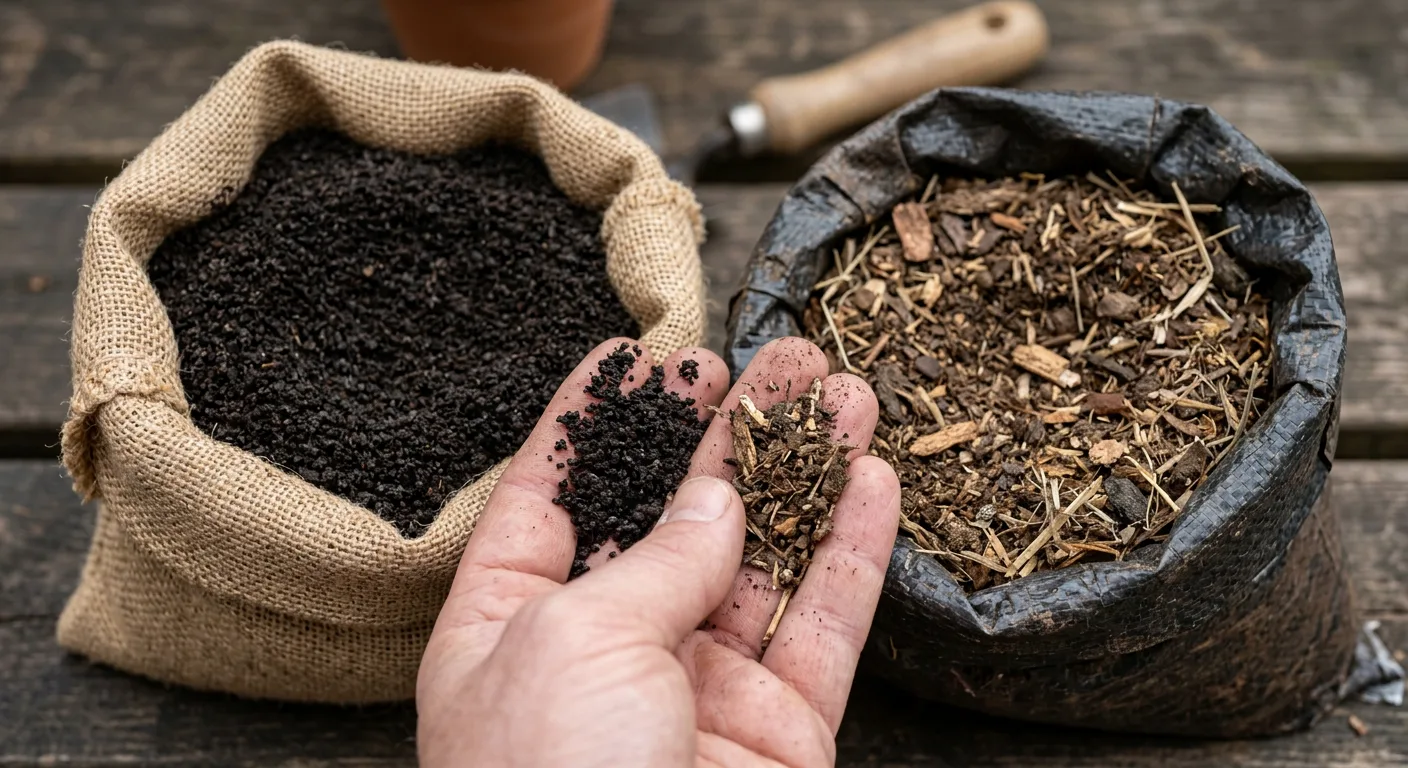
Worm Castings vs Compost for Cannabis: Key Differences
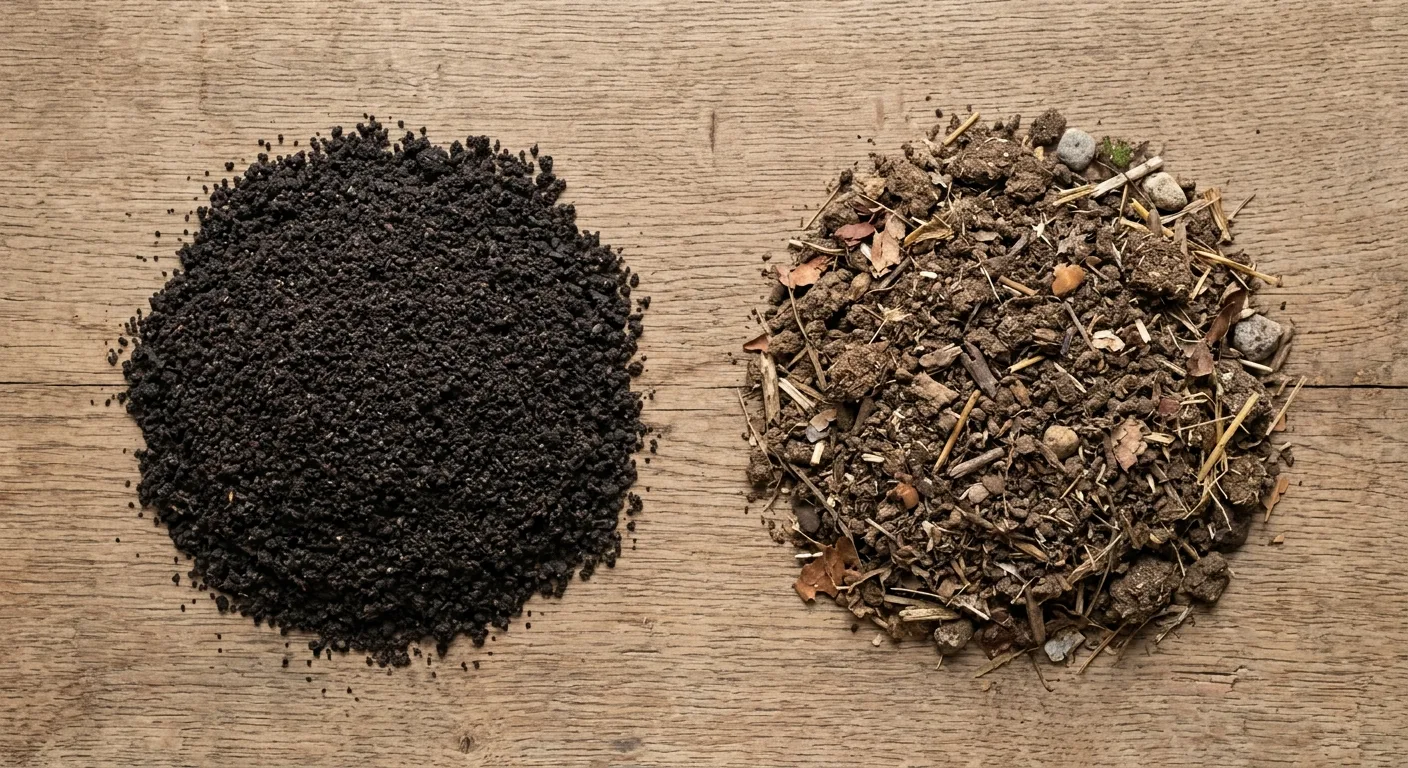
Worm castings differ from standard compost in microbial density, nutrient availability, texture, and pathogen safety — making them superior as a cannabis soil amendment despite their higher cost per cubic foot.
Both compost and worm castings are organic soil amendments, but they're produced through fundamentally different processes. Traditional compost relies on thermophilic (heat-loving) bacteria to break down material at 130–160°F, while vermicomposting is a mesophilic process driven by worm gut biology at 55–77°F. This difference matters for your cannabis plants.
| Factor | Worm Castings | Traditional Compost |
|---|---|---|
| Microbial diversity | Very high — 10–20× more activity | Moderate — heat kills some species |
| NPK range | 1-0-0 to 2-1-1 (slow release) | 1-1-1 to 3-2-2 (variable) |
| Pathogen risk | Very low — worm gut eliminates pathogens | Low if properly heated, higher if not |
| Weed seeds | None — digested completely | Possible if pile didn't reach temp |
| Texture | Fine, uniform, crumbly | Coarser, more variable |
| Humic acid content | High | Moderate |
| Burn risk | Zero | Low to moderate (hot compost) |
| Cost per cubic foot | $8–$20 | $2–$6 |
| Best use in cannabis | Amendment, top dress, tea | Base soil builder, mulch |
Key takeaway: Worm castings and compost aren't competitors — they're complements. Use compost as your soil's structural foundation and worm castings as the biological activator. A living soil cannabis mix benefits from both.
How Much Worm Castings to Add to Cannabis Soil by Growth Stage
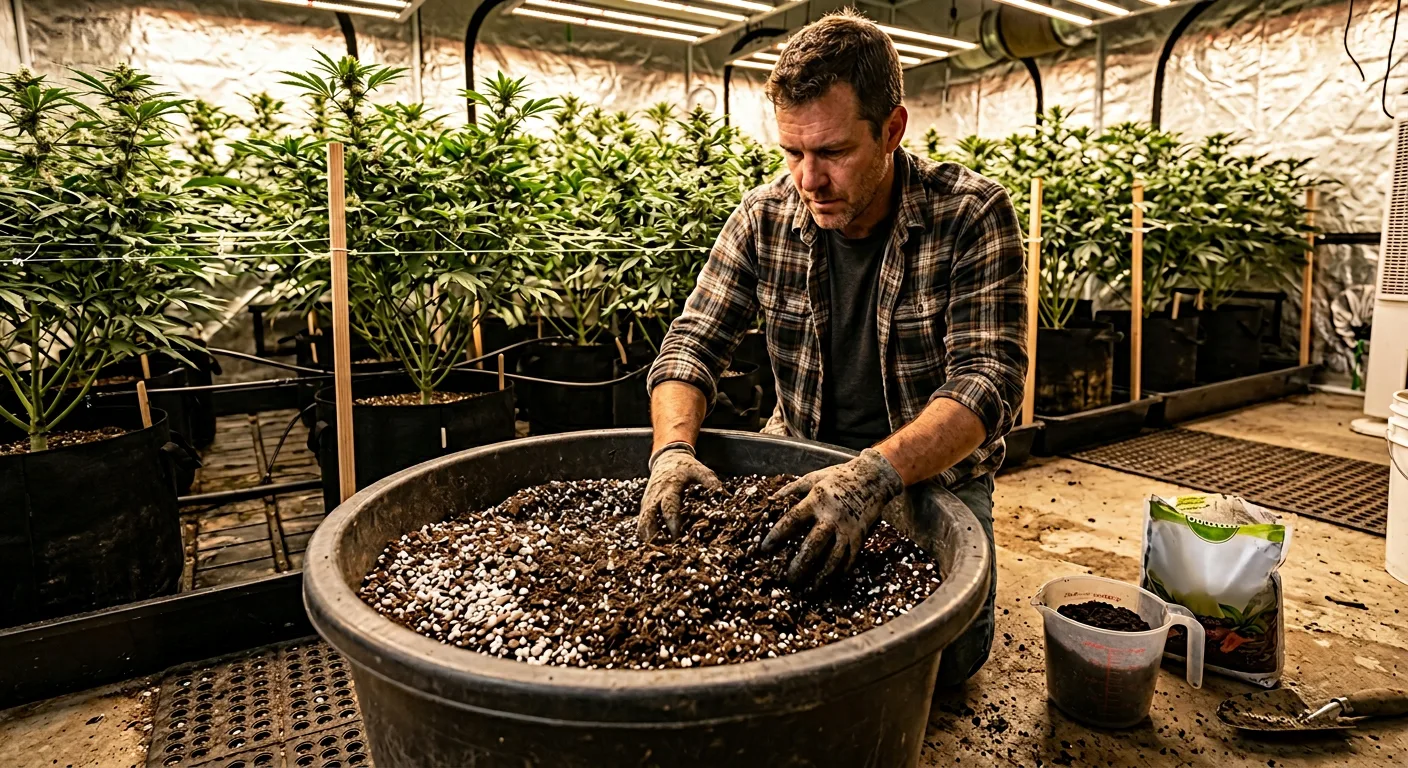
For most cannabis grows, mix 15–25% worm castings by volume into your base soil. Seedlings thrive at the lower end (15%), vegetative plants at 20–25%, and flowering plants benefit more from top-dressing than heavy mix-ins.
The right ratio depends on your base soil, container size, and growth stage. As community grower forums like 420 Magazine confirm, recommendations range from 10–20% for general mixes, with some experienced growers running up to 50% for soilless blends with added perlite. Here's our tested protocol:
Seedling Stage (Weeks 1–3)
Light Mix: 15% Worm Castings
Blend 1.5 parts castings with 5 parts base mix (peat or coco coir), 2 parts perlite, and 1.5 parts standard compost. Seedlings need gentle nutrition — castings won't burn them, but keeping the ratio moderate leaves room for the microbial population to establish before heavy feeding begins. This mix works beautifully for seeds from our germination guarantee program.
Vegetative Stage (Weeks 3–8)
Standard Mix: 20–25% Worm Castings
At transplant into final containers, increase castings to 20–25% of total volume. For a 5-gallon fabric pot, that's roughly 4–5 cups of castings mixed into the soil. This provides a nitrogen-rich baseline that supports vigorous vegetative growth. Reapply as top dress every 4–6 weeks during veg.
Pre-Flower Transition
Switch to Top-Dressing Protocol
Once you flip to 12/12 (or autoflowers begin showing pistils), stop mixing castings into soil and switch to surface applications. This avoids disturbing roots during the critical transition period. Apply 1/2 cup per 5-gallon pot as a top dress at the flip.
Growing tip: Vigorous feeders like OG Kush Feminized (26% THC) and Sour Diesel Feminized (24% THC) respond exceptionally well to the 25% castings ratio during veg. Lighter feeders like Swiss Miss Feminized (15% THC) do great at 15–20%.
Top-Dressing Worm Castings During Cannabis Flowering

Top-dressing with worm castings during flowering delivers a gentle, sustained nutrient release directly to the root zone without disturbing the plant. Apply 1/4 to 1/2 cup per 5-gallon pot every 2–3 weeks through mid-flower.
Flowering cannabis plants have specific nutritional demands — increasing phosphorus and potassium needs while still requiring nitrogen for bud structure. Worm castings top dress during cannabis flowering addresses the nitrogen side without the risk of over-feeding, while the microbial inoculant keeps the soil food web active during the plant's most demanding phase.
Step-by-Step Top-Dress Protocol
Clear the Surface
Gently move aside any mulch or cover crop. You want direct contact between castings and the soil surface.
Apply Castings Evenly
Spread 1/4–1/2 cup of worm castings in a ring around the stem, staying 1–2 inches away from the main stalk. For larger containers (10–15 gallons), use up to 1 cup.
Lightly Water In
Water gently to settle the castings into the soil surface. Don't drench — you want the castings to form a thin living layer, not wash away into the saucer.
Replace Mulch Layer
Cover the castings with straw or cover crop clippings to maintain moisture and protect the microbial population from UV light and drying.
Flowering Top-Dress Schedule
| Flowering Week | Application | Amount (per 5-gal pot) | Notes |
|---|---|---|---|
| Week 1 (flip) | Top dress | 1/2 cup | Transition boost |
| Week 3 | Top dress | 1/4 cup | Early bud formation |
| Week 5 | Top dress + AACT tea | 1/4 cup + 1 quart tea | Peak nutrient demand |
| Week 7 | Last top dress | 1/4 cup | Final feeding before flush |
| Week 8–9+ | Plain water only | None | Allow natural senescence |
Caution: Stop all top-dressing at least 10–14 days before harvest. While castings won't cause chemical buildup like synthetic fertilizers, allowing the soil food web to wind down naturally improves the final flavor and burn quality of your flower.
How to Make Actively Aerated Worm Castings Tea (AACT)
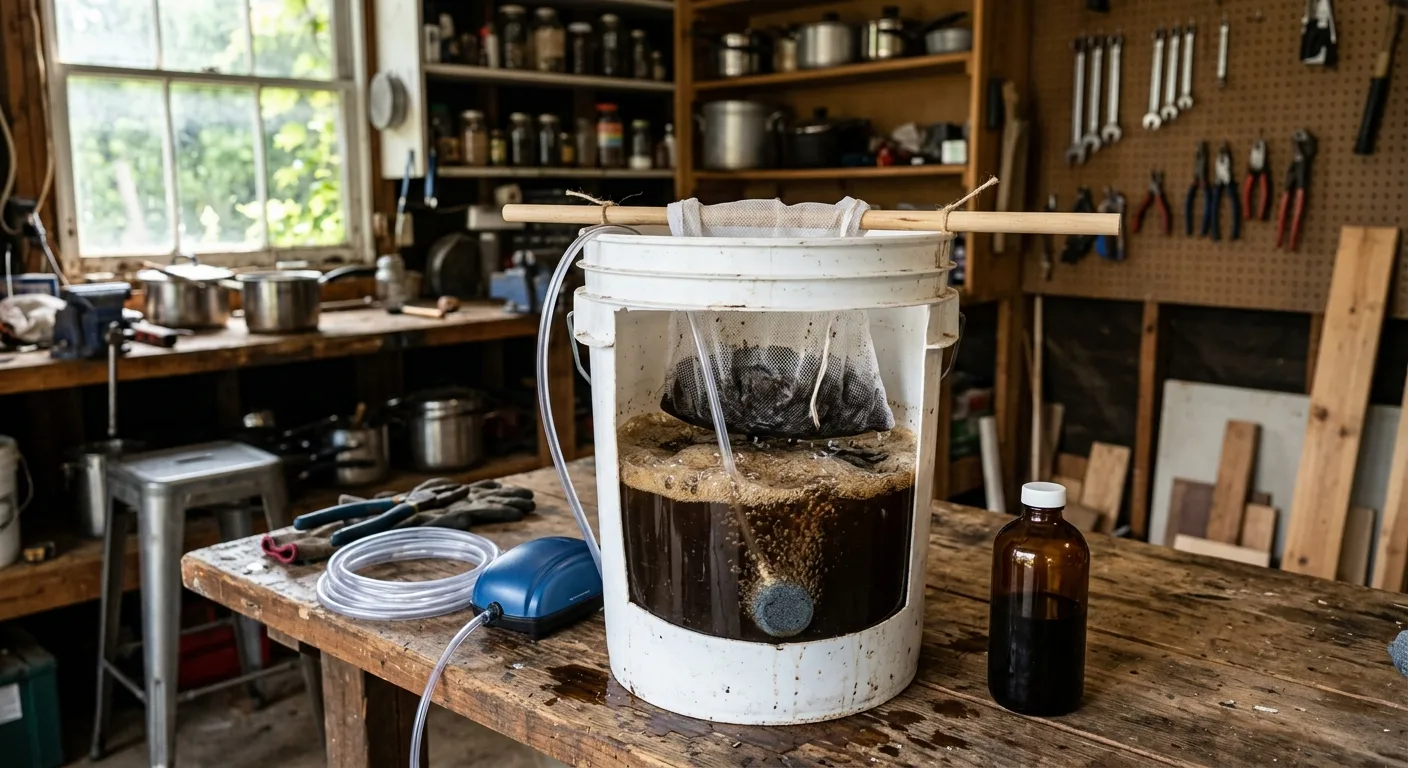
Actively aerated compost tea (AACT) made from worm castings extracts and multiplies the beneficial microorganisms in vermicompost into a concentrated liquid inoculant. A 24–48 hour brew produces billions of beneficial bacteria and fungi per milliliter.
Making worm tea for cannabis plants is one of the most cost-effective ways to stretch your castings supply. A single cup of castings can produce 5 gallons of potent microbial tea. The key is active aeration — without it, your brew goes anaerobic and harmful. As the 420 Magazine community notes, a properly brewed aerobic tea "shouldn't smell bad in the first place" — if it smells like rotten fish, something went wrong.
Equipment Checklist
- 5-gallon food-grade bucket
- Aquarium air pump (minimum 40+ GPH output)
- Large air stone or multi-outlet air manifold
- Fine mesh bag or old nylon stocking (400-micron ideal)
- 1–2 cups high-quality worm castings
- 1 tablespoon unsulphured blackstrap molasses
- Dechlorinated water (let tap water sit 24 hours or use a carbon filter)
- Optional: 1 tsp kelp meal, 1 tsp fish hydrolysate
Brewing Steps
Fill and Dechlorinate
Fill the 5-gallon bucket with water. If using tap water, run the air pump for 30 minutes first to off-gas chlorine. Chloramine (used in many municipal systems) requires a carbon filter — it won't off-gas with aeration alone.
Load the Castings Bag
Place 1–2 cups of castings into the mesh bag. Tie it off and suspend it in the bucket. Think of it as a giant tea bag. Drop the air stone directly beneath it so bubbles agitate the castings continuously.
Add Microbial Food
Dissolve 1 tablespoon of unsulphured blackstrap molasses in warm water and add it to the bucket. The molasses feeds bacterial populations, causing them to multiply exponentially. Optional additions like kelp meal feed fungal populations.
Brew for 24–48 Hours
Keep the pump running continuously. At room temperature (65–80°F), the brew reaches peak microbial activity at 24–36 hours. Beyond 48 hours, the microbes begin consuming each other as food runs out.
Apply Immediately
Once brewed, the tea must be used within 4–6 hours. The microbes begin dying without fresh oxygen and food. Apply as a soil drench at 1 quart per 5-gallon pot, or dilute 1:4 and use as a foliar spray during veg. Return the spent castings from the bag to your worm bin.
Key takeaway: AACT worm tea cannabis applications are most effective every 2–4 weeks during veg and once at week 3–5 of flower. Apply as a soil drench in the evening or during lights-off to protect UV-sensitive microbes. Monitor your grow environment with our VPD calculator to ensure conditions support microbial activity in the root zone.
Setting Up a Home Worm Bin for Continuous Castings Supply
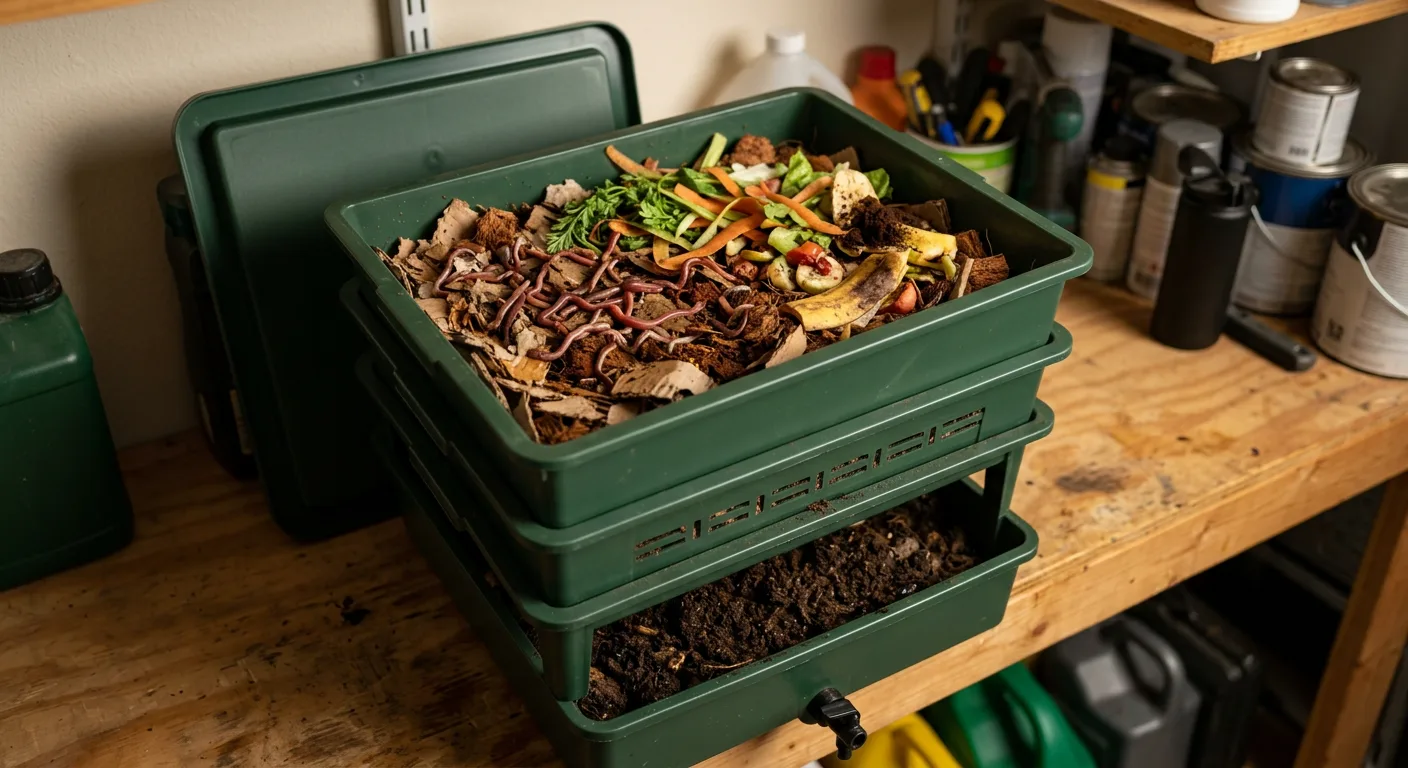
A home worm bin provides a continuous, free supply of premium vermicompost. A basic stacked-tray system with 1 pound of red wigglers can process 3–4 pounds of food scraps per week and produce enough castings for a 4–8 plant cannabis grow.
Species Selection: Eisenia fetida vs European Nightcrawlers
| Trait | Eisenia fetida (Red Wigglers) | Eisenia hortensis (European Nightcrawlers) |
|---|---|---|
| Composting speed | Fast — consume body weight daily | Moderate — slower eaters |
| Temperature range | 55–77°F ideal | 55–75°F ideal |
| Reproduction rate | Very fast — doubles population in 60–90 days | Slower — doubles in 120–150 days |
| Casting quality | Excellent — fine texture, high microbial load | Very good — slightly coarser |
| Cost per pound | $25–$40 | $30–$50 |
| Best for | Indoor bins, fast castings production | Larger outdoor systems, also good for fishing |
For most cannabis growers, Eisenia fetida — commonly called red wigglers or Californian composting worms — is the best choice. They reproduce quickly, tolerate the confined space of indoor bins, and produce exceptionally fine, microbially dense castings. As Dinafem's worm castings guide notes, these are the most commonly used species in vermiculture worldwide.
Bin Setup Steps
Choose Your System
Stacked-tray bins (like the Worm Factory 360 or Urban Worm Bag) are the most beginner-friendly. They allow worms to migrate upward into fresh food, leaving finished castings in the bottom tray for easy harvest. DIY options using stacked Rubbermaid totes with drilled drainage holes work well too.
Prepare the Bedding
Fill the first tray with moist shredded newspaper, cardboard, or coconut coir. The bedding should feel like a wrung-out sponge — damp but not dripping. Add a handful of garden soil or finished compost to introduce initial microorganisms. This is the worms' habitat, not their food.
Add 1 Pound of Red Wigglers
Place the worms on top of the bedding under a light source — they'll burrow down within 20 minutes. One pound (roughly 1,000 worms) is the standard starting population for a home bin. Source from reputable vermiculture suppliers who ship in breathable bags with bedding.
Begin Feeding Gradually
Start with small amounts of food waste — fruit and vegetable scraps, coffee grounds, crushed eggshells. Bury food under bedding to prevent fruit flies. Avoid citrus, onions, meat, dairy, and oily foods. The worms will ramp up consumption as their population grows.
Harvest Castings Every 3–4 Months
When the bottom tray is dark, uniform, and earthy-smelling with no recognizable food scraps, it's ready to harvest. Remove the tray, spread contents on a tarp under light, and let the worms migrate to the center. Scoop the outer castings for your cannabis garden.
Growing tip: Feed your worms cannabis fan leaves and stems from defoliation sessions. The worms break them down, and the nutrients cycle back into castings for your next grow. It's the ultimate closed-loop cannabis cultivation system. Plan your defoliation and feeding schedules with our grow planner.
Evaluating Commercial Worm Castings: Pure vs Bulked
The best worm castings for cannabis growing are 100% pure vermicast with no filler materials. "Bulked" products — cut with peat, soil, or unfinished compost — cost less but deliver dramatically fewer microbes and nutrients per dollar.
How to Spot Quality Castings
- Color: Pure castings are uniformly dark brown to black. Lighter brown patches indicate unfinished material or filler.
- Texture: Should be fine, granular, and crumbly — like rich coffee grounds. Clumpy, muddy, or chunky texture suggests incomplete processing or excess moisture.
- Smell: Fresh, earthy aroma — like forest floor after rain. Any ammonia, sour, or rotten odor means the material is anaerobic or unfinished.
- Debris: Pure castings have zero visible food scraps, wood chips, or bedding material. If you can identify what the worms ate, it's not fully processed.
- Moisture: Should hold together when squeezed but crumble when released. Overly wet castings go anaerobic in storage; overly dry castings have reduced microbial activity.
Red Flags in Commercial Products
Watch out for: Products labeled "worm castings blend" or "vermicompost mix" often contain 30–50% filler materials. Check the ingredient list — if it includes peat moss, bark fines, or "organic matter," you're paying castings prices for compost. True castings list only one ingredient: earthworm castings. Some reputable brands include Wiggle Worm, Black Castings, and Worm Power — but always verify by sight and smell when the bag arrives.
Worm Castings and Mycorrhizae in Living Soil Cannabis Systems

Worm castings and mycorrhizal fungi form a synergistic partnership in living soil. Castings feed the bacterial-dominated portion of the soil food web while mycorrhizae extend the fungal network — together they create the complete biological engine that worm castings living soil cannabis systems depend on.
In a living soil approach, you're not feeding the plant directly — you're feeding the soil biology, which in turn feeds the plant. Worm castings are the premier bacterial inoculant, introducing billions of beneficial microbes per gram. Mycorrhizal fungi (especially arbuscular mycorrhizae like Glomus intraradices) form symbiotic connections with cannabis roots, extending the effective root zone by up to 1,000 times and trading phosphorus for plant sugars.
How They Work Together
- Castings feed bacteria → bacteria mineralize nutrients → mycorrhizae transport them to roots. This is the core nutrient cycling loop in living soil.
- Humic acids in castings stimulate mycorrhizal spore germination and hyphal growth, research suggests.
- Castings improve soil structure — creating the aerated, moisture-retentive environment mycorrhizae need to colonize.
- Microbial diversity from castings helps suppress pathogenic fungi that could otherwise outcompete beneficial mycorrhizae.
When building a living soil recipe for cannabis, we recommend inoculating with mycorrhizae at transplant (sprinkle granular product directly on roots) and using worm castings as both a mix-in and ongoing top-dress. This dual approach establishes both the bacterial and fungal legs of the soil food web from day one. Strains bred for organic growing like Northern Lights x Big Bud Feminized (20% THC) and White Widow Feminized (25% THC) are proven performers in these systems.
Living Soil Base Recipe with Worm Castings
This is our go-to mix for no-till cannabis beds and large fabric pots:
- 1/3 high-quality sphagnum peat moss or coco coir
- 1/3 aeration (pumice, perlite, or lava rock)
- 1/6 worm castings (roughly 15–20% of total)
- 1/6 quality thermal compost
- Amendments per cubic foot: 1/2 cup kelp meal, 1/2 cup neem meal, 1/2 cup crustacean meal, 1 cup basalt rock dust, 1/2 cup gypsum
- Mycorrhizal inoculant at transplant
This recipe supports an entire cannabis lifecycle with minimal additional inputs — just top-dress castings and brew occasional AACT teas. It connects naturally to our advanced growing guide for growers exploring both organic soil and hydroponic approaches. For strain selection tailored to organic methods, explore our Super Lemon Haze Feminized (23% THC) — a vigorous sativa that thrives in rich living soil.
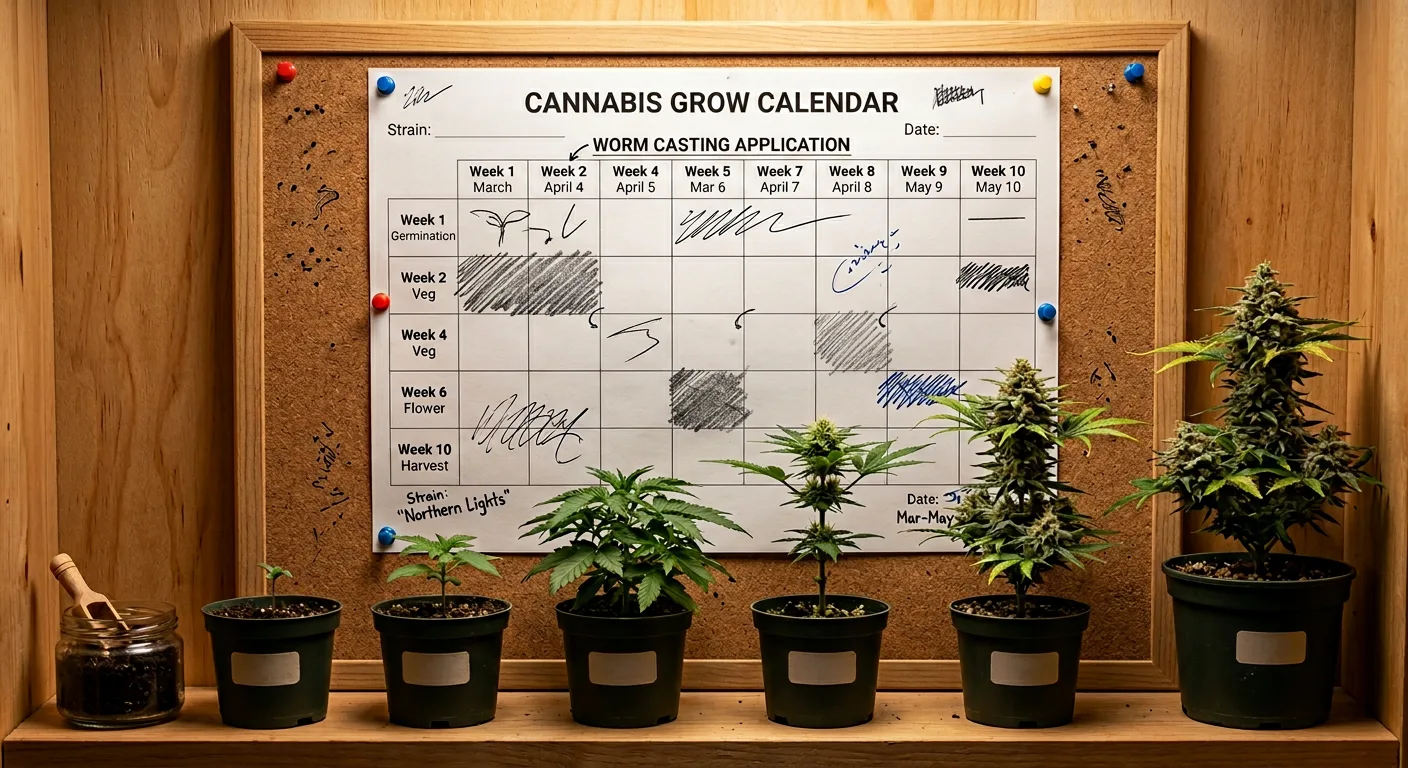
Complete Worm Castings Application Schedule: Seed to Harvest
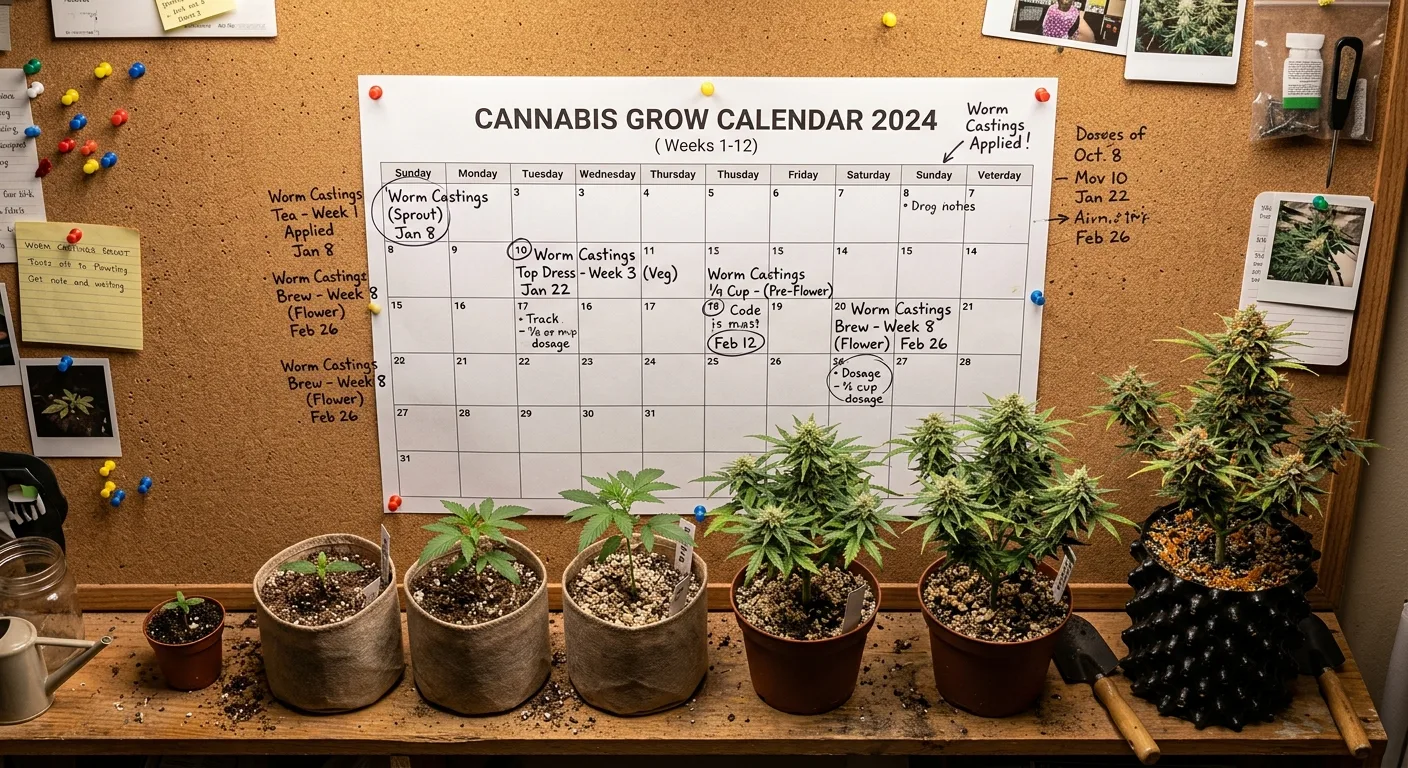
This visual schedule maps every worm castings application from germination through harvest for a standard 8–10 week flowering photoperiod cannabis grow. Follow this timeline for consistent results with earthworm castings cannabis plants.
| Week | Stage | Application Method | Amount (per 5-gal pot) | Additional Notes |
|---|---|---|---|---|
| 0 | Germination | Seedling mix (15% castings) | Built into soil | Use small starter cups |
| 1–2 | Seedling | None needed | — | Soil provides all nutrition |
| 3 | Transplant to veg pot | Soil mix (20–25% castings) | Built into soil | Add mycorrhizal inoculant to root ball |
| 4–5 | Early veg | AACT tea drench | 1 quart | Boosts microbial colonization |
| 6–7 | Mid veg | Top dress | 1/2 cup | Recharge nitrogen supply |
| 8 | Late veg / transplant to final pot | Soil mix (20–25% castings) | Built into soil | Final container — minimum 5 gallons |
| 9 (Flip) | Flower week 1 | Top dress | 1/2 cup | Transition feeding |
| 11 | Flower week 3 | Top dress + AACT tea | 1/4 cup + 1 qt tea | Peak bud development |
| 13 | Flower week 5 | Top dress | 1/4 cup | Mid-flower maintenance |
| 15 | Flower week 7 | Final top dress (optional) | 1/4 cup | Only for 10+ week strains |
| 16–17 | Flower week 8–9 | Plain water | None | Natural fade and harvest prep |
Key takeaway: The schedule above provides a complete worm castings feeding program. Adjust timing for autoflowers (compress to match their shorter lifecycle) and for strains like Quantum Kush Feminized (30% THC) that flower for 10+ weeks — extend top-dress applications through week 8 of flower. Use our grow planner to customize the schedule for your specific strain and setup.
For autoflowering varieties like Amnesia Haze Autoflower (17% THC) or Banana Kush Autoflower (18% THC), compress the entire schedule into a tighter window. Mix castings into soil at planting (no transplant needed), top-dress at weeks 3 and 5, and apply AACT tea once around week 4.
If you notice any unusual symptoms during the grow, use our plant diagnosis tool to rule out deficiencies — remembering that castings are gentle and rarely the cause of problems. For harvest timing after your final worm castings application, check our detailed guide on when to harvest cannabis for maximum potency.
Frequently Asked Questions About Worm Castings for Cannabis
Below are the most common questions we see from growers on forums like r/microgrowery and r/cannabiscultivation about using worm castings in cannabis cultivation.
Can worm castings burn cannabis plants?
No. Worm castings cannot burn cannabis plants at any concentration. Unlike synthetic fertilizers or even fresh animal manures, castings have a very mild NPK (typically 1-0-0 to 2-1-1) and release nutrients slowly through microbial activity. As noted by multiple sources including Royal Queen Seeds, you can apply castings directly to the base of the stem without risk. This is one of their greatest advantages — they're impossible to overdo.
How often should I apply worm castings to cannabis plants?
During the vegetative phase, top-dress with worm castings every 4–6 weeks. During flowering, increase frequency to every 2–3 weeks with smaller amounts (1/4 cup per 5-gallon pot). AACT worm tea can be applied every 2–4 weeks as a complement to top-dressing. Stop all applications 10–14 days before harvest to allow a natural fade.
Can I use worm castings in hydroponic or coco coir cannabis grows?
Yes, but indirectly. Worm castings tea (AACT) works well as a root drench in coco coir systems, introducing beneficial microbes without clogging drain lines. For true hydroponic setups (DWC, NFT), use only strained AACT tea through a 200-micron filter to avoid blocking emitters. Castings as a physical amendment work best in soil and soilless mixes. For coco-specific guidance, see our coco coir cannabis growing guide.
What's the best worm castings brand for cannabis growing?
Look for 100% pure, single-ingredient castings with no fillers. Reputable brands include Wiggle Worm Soil Builder, Black Castings (from Black Soldier Fly larvae hybrid systems), and Worm Power. However, the best castings are homemade — you control the inputs and freshness. When evaluating any brand, check for dark color, fine crumbly texture, earthy smell, and zero visible debris. Avoid products labeled "blends" or "mixes."
Do worm castings replace regular fertilizer for cannabis?
For a complete seed-to-harvest feeding program, worm castings alone may not provide enough phosphorus and potassium during peak flowering. They excel as a biological foundation and nitrogen source. In a well-built living soil with mineral amendments (rock dusts, bone meal, kelp), castings can be the primary ongoing input. For container grows with lighter base soils, plan to supplement P and K during weeks 3–6 of flowering. Use our nutrient calculator to check if your program covers all bases.
Sources & References
This article was researched and fact-checked using 2 verified sources including 2 community resources.
- Worm Castings For Growing Cannabis – Inch by Inch AZ Worm Castings — inchbyinchaz.com [Community]
- Worm Castings Cannabis: Boost Organic Plant Growth — blimburnseeds.com [Community]