A brick of dried coconut husk doesn't look like much. But rehydrate it, buffer it correctly, and plant cannabis into it — and you'll watch roots explode with a speed that makes soil growers jealous and hydro growers nod in respect. Coco coir cannabis growing occupies the sweet spot between the simplicity of soil and the performance of hydroponics, which is exactly why it has become the go-to substrate for intermediate and advanced cultivators worldwide in 2026.
In our experience growing in coco for over 15 years, we've seen the same mistakes repeated: unbuffered coco causing ghost deficiencies, pH drift creating lockouts that mimic overfeeding, and watering schedules borrowed from soil guides that starve roots of oxygen. This guide is the missing middle ground — more actionable than academic research papers, more detailed than beginner overviews, and structured so you can follow it seed to harvest.
What Is Coco Coir and Why Does Cannabis Love It?
Coco coir is the processed fibrous material extracted from coconut husks — a byproduct of the coconut industry primarily sourced from India and Sri Lanka. It carries a near-neutral pH baseline of 5.8–6.5, contains zero inherent nutrients (unlike soil), and delivers near-hydroponic oxygen levels at the root zone while still being hand-watered like a traditional potting mix.
Unlike peat moss, coco coir is renewable and sustainable. A single coconut palm produces husks for decades, whereas peat bogs take thousands of years to form. As detailed in Riococo's cultivation guide, freshwater-processed coco avoids the salt contamination that plagues cheaper brands cured in ocean water.
The Three Grades of Coco Coir
Not all coco is created equal. The raw husk produces three distinct materials, each with different properties:
- Coco pith (coco dust): Fine, soil-like particles with exceptional water retention. Holds moisture well but can compact and reduce aeration if used alone.
- Coco fiber: Stringy, medium-length strands that create air pockets and improve drainage. Breaks down faster than chips but adds excellent structure.
- Coco chips: Chunky pieces resembling small bark nuggets. Provide maximum aeration and drainage but minimal water retention.
Optimal blend for cannabis: The best coco coir mixes combine all three grades. As Riococo notes, their cannabis-specific mix achieves 30% aeration — more than double what coco pith and perlite alone provide. For DIY mixing, aim for roughly 60% pith, 20% fiber, and 20% chips before adding perlite.
Why Roots Thrive in Coco
Cannabis roots need three things: water, nutrients, and oxygen. Soil delivers the first two but often restricts the third. Hydroponic systems excel at oxygenation but require pumps and constant monitoring. Coco coir naturally balances all three.
The fibrous structure creates millions of micro air pockets that persist even when the medium is saturated. This means roots access oxygen continuously — unlike soil, which can become anaerobic when overwatered. The result is visibly faster vegetative growth, typically 15–25% quicker than identical genetics in organic soil.
Coco Coir vs Soil vs Hydroponics: The Honest Comparison

Coco coir is often lumped with soil or hydroponics depending on who's writing. In reality, it's a distinct category — a soilless substrate that behaves like a hybrid. It shares soil's hand-watering simplicity and hydro's nutrient precision, but carries unique demands (especially around calcium and pH) that neither soil nor hydro growers encounter.
| Factor | Soil | Coco Coir | DWC Hydro |
|---|---|---|---|
| Growth Speed | Baseline | 15–25% faster | 20–30% faster |
| Yield Potential | Moderate | High | Highest |
| Forgiveness | High (buffers errors) | Moderate | Low (errors punish fast) |
| pH Target | 6.0–6.8 | 5.8–6.2 | 5.5–5.8 |
| Nutrient Control | Limited | Precise | Precise |
| Cal-Mag Need | Rarely needed | Every feeding | Moderate |
| Watering Frequency | Every 2–4 days | Every 1–2 days | Continuous |
| Bug Pressure | Higher (organic matter) | Lower | Lowest |
| Startup Cost | Low | Low–Medium | Medium–High |
| Skill Level | Beginner | Intermediate | Advanced |
Bottom line: Coco coir delivers 80–90% of hydroponic performance with about 50% of the complexity. If you've outgrown soil but aren't ready to manage reservoirs, air stones, and water chillers, coco is your medium. For a deeper dive into full hydroponic setups, see our complete hydroponics guide.
The Buffering Step Most Growers Skip (and Regret)
Buffering coco coir before planting cannabis is the single most important preparation step — and the one most often skipped. Raw or improperly buffered coco contains cation exchange sites (CEC sites) that aggressively grab calcium and magnesium ions from your nutrient solution, hoarding them on the fiber while starving your plants during the critical first two weeks.
This isn't a minor nuisance. It produces calcium and magnesium deficiency symptoms that appear even when your feed contains adequate cal-mag. As GrowWeedEasy's coco guide confirms, new growers frequently misdiagnose this as overfeeding and reduce nutrients — making the problem worse.
Critical warning: Even coco labeled "pre-washed" or "low-EC" is not necessarily buffered. Washing removes surface salts (sodium, potassium, chloride) but does NOT saturate the CEC sites with calcium and magnesium. Always buffer — even premium brands — unless the label specifically states "pre-buffered" and lists the buffering agent.
Step-by-Step Coco Coir Buffering Protocol
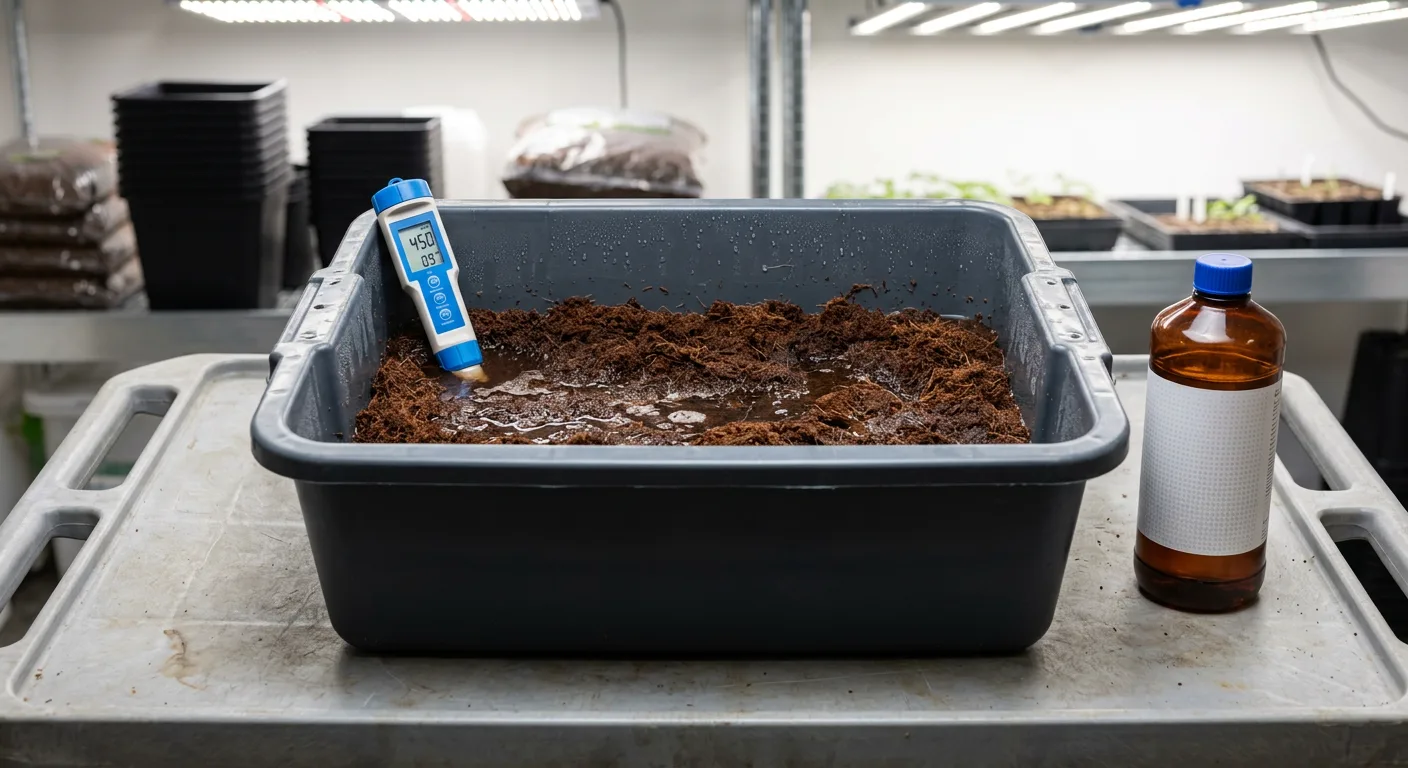
Rehydrate the Coco
Break apart your compressed coco brick or open your loose bag. Place it in a large tub or container. Add warm water (not hot) and let the coco expand fully. For a 5 kg compressed brick, you'll need approximately 15–20 liters of water.
Prepare the Cal-Mag Soak
Mix a cal-mag solution at 300–500 PPM (EC 0.6–1.0) using a dedicated cal-mag supplement. Use enough solution to fully submerge the coco. pH the solution to 5.8–6.2 before adding it to the coco. Use our nutrient calculator to dial in exact concentrations.
Soak for 8–24 Hours
Submerge the coco in the cal-mag solution and let it sit for a minimum of 8 hours. Overnight (16–24 hours) is ideal. During this time, calcium and magnesium ions displace the sodium and potassium naturally present on the coco's CEC sites.
Drain and Rinse
Drain the soaking solution completely. Rinse the coco once with fresh pH'd water (5.8–6.2) to flush out displaced salts. Test the runoff EC — it should read below 0.3 EC (150 PPM). If higher, rinse again.
Mix in Perlite and Plant
Once buffered and drained, mix your perlite at a 70/30 ratio (coco to perlite by volume). The coco should feel like a wrung-out sponge — moist but not dripping. It's now ready for planting.
Time-saving option: Several brands sell genuinely pre-buffered coco/perlite blends. Mother Earth Coco Mix (70/30) and FoxFarm Cultivation Nation 70/30 are two options that GrowWeedEasy has tested extensively with consistently good results. If you use these, you can skip the buffering protocol — but always verify by checking runoff EC before transplanting.
Setting Up Your Coco Coir Medium and Containers

Your medium blend and container choice directly impact root oxygenation, watering frequency, and overall plant health. The setup is simple, but the details matter — especially drainage and pot selection.
Medium Blend Options
- 100% coco coir: Retains maximum moisture. Best for automated drip systems where frequent irrigation is guaranteed. Risk of overwatering in hand-watered setups.
- 70% coco / 30% perlite (most popular): The gold standard ratio recommended across nearly every coco growing resource. Provides excellent balance of water retention and air porosity. Ideal for hand-watering 1–2 times daily.
- 60% coco / 20% perlite / 20% hydroton: Enhanced drainage for growers who tend to overwater. The clay pebbles add structural support and increase air space at the bottom of the container. As Royal Queen Seeds notes, premixed coco/clay pebble blends are gaining popularity in online grow shops.
- 50% coco / 50% perlite: Aggressive drainage ideal for clone rooting and seedling stages, as recommended by The Coco Depot. Roots penetrate quickly, though you'll need to water more frequently.
Container Selection
Container choice is as important as the medium inside it. Here's what works — and what doesn't:
- Fabric pots (3–5 gallon): Our top recommendation. They air-prune roots naturally, prevent circling, and drain freely from all sides. A 5-gallon fabric pot handles most photoperiods comfortably; 3-gallon works well for autoflowers.
- Plastic pots with drainage holes: Acceptable if you drill additional holes in the sides (bottom 2 inches). Without excellent drainage, coco becomes waterlogged at the base.
- Grow bags (commercial coco slabs): Used in commercial operations with automated irrigation. Not ideal for home hand-watering unless you're running drip lines.
- Avoid: Any container without bottom drainage. Decorative pots, cache pots, and solid buckets will drown roots in coco within days.
The setup we recommend for most home growers: Buffered coco/perlite at 70/30 in 5-gallon fabric pots, sitting on elevated saucers or drip trays for easy runoff collection. This combination works from seed to harvest without repotting. For seedlings, start in solo cups or 1-gallon fabric pots with the same 70/30 mix and transplant at week 2–3. See our seedling care guide for transplant timing.
Watering Cannabis in Coco Coir: Frequency, Runoff, and the Wet-Dry Myth
How often to water cannabis in coco coir is the question that separates successful coco growers from frustrated ones. The answer: more frequently than soil, always to runoff, and never allow the medium to dry completely. Unlike soil, where wet-dry cycles encourage root searching, coco performs best when kept consistently moist.
Why Coco Should Never Dry Out
When coco coir dries completely, two things happen. First, it becomes hydrophobic — water channels along the pot edges instead of penetrating the root zone. Second, the EC (salt concentration) around the roots spikes dramatically as water evaporates, potentially burning fine root hairs.
Using substrate moisture sensors, Rx Green Technologies has documented that coco is fully saturated at approximately 40% volumetric water content (VWC) and should be re-irrigated near 20% VWC. Dropping below 18% risks permanent wilting point damage, especially in young plants.
Watering Frequency by Growth Stage
| Growth Stage | Watering Frequency | Runoff Target | Key Notes |
|---|---|---|---|
| Seedling (week 1–2) | Once daily, small volume | 10% runoff | Use solo cups; don't saturate entire pot |
| Early veg (week 3–4) | Once daily | 10–15% runoff | Water when top 1 inch of coco feels dry |
| Late veg (week 5–6) | Once to twice daily | 15–20% runoff | Increase as root mass fills container |
| Early flower (week 1–3) | Daily to twice daily | 15–20% runoff | Plants drink heavily during stretch |
| Mid flower (week 4–6) | Daily | 10–20% runoff | Consumption may decrease as stretch stops |
| Late flower (week 7–9) | Daily, reduced volume | 10–15% runoff | Some growers reduce slightly pre-harvest |
The runoff rule: Every watering should produce 10–20% runoff. This isn't wasted — it's flushing accumulated salts from the root zone and providing you with diagnostic data. Collect it, test its EC and pH, and use those numbers to adjust your next feeding. If runoff EC is climbing, you're overfeeding. If it's dropping, the plant is eating aggressively and may need more.
Hand-Watering vs. Automated Drip Systems
Hand-watering works perfectly for 1–12 plants. Water slowly in a circular pattern, starting from the outer edges and working inward. This encourages roots to spread outward rather than just clustering beneath the stem.
For larger grows, automated drip systems with timers ensure consistency. Set 2–4 irrigation events per day during flower, each delivering enough volume for 15–20% runoff total. Halos or drip stakes distribute water more evenly than single-point emitters.
The Complete Coco Coir Feeding Schedule by Week
Cannabis in coco coir requires a complete nutrient solution at every watering because the medium provides zero nutrition on its own. Cal-mag is non-negotiable at 150–200 PPM as a baseline in every feeding. Below is our recommended 9-week feeding schedule from late veg through harvest, with EC targets aligned to our hydroponic guide for internal consistency.
Why Cal-Mag Is Non-Negotiable
Even after buffering, coco's CEC sites continue to interact with calcium and magnesium throughout the grow. Without consistent supplementation at 150–200 PPM, deficiency symptoms — brown spots, interveinal yellowing, stunted growth — appear within 7–10 days. Add cal-mag first when mixing nutrients, then base nutrients, then boosters.
Sample 9-Week Coco Coir Feeding Schedule
| Week | Stage | EC Target | PPM (500 scale) | Cal-Mag PPM | Base Nutrients | Additives |
|---|---|---|---|---|---|---|
| 1 | Late Veg | 0.8–1.0 | 400–500 | 150 | Grow formula (full strength) | Silica (optional) |
| 2 | Transition | 1.0–1.2 | 500–600 | 150 | 50/50 Grow + Bloom | Silica |
| 3 | Early Flower | 1.2–1.4 | 600–700 | 200 | Bloom formula (full strength) | Silica, enzyme |
| 4 | Flower | 1.4–1.6 | 700–800 | 200 | Bloom (full) | PK booster (light) |
| 5 | Peak Flower | 1.6–1.8 | 800–900 | 200 | Bloom (full) | PK booster (medium) |
| 6 | Peak Flower | 1.6–1.8 | 800–900 | 200 | Bloom (full) | PK booster (full) |
| 7 | Late Flower | 1.4–1.6 | 700–800 | 150 | Bloom (reduce 25%) | PK booster (taper) |
| 8 | Ripening | 1.0–1.2 | 500–600 | 150 | Bloom (half strength) | None or enzyme only |
| 9 | Flush / Harvest | 0.0–0.3 | 0–150 | 0–100 | Plain water or light feed | None |
EC note: These EC targets represent the total solution EC after adding all components to water. If your tap water starts at 0.3 EC (150 PPM), subtract that from your target when calculating nutrient additions. RO (reverse osmosis) water at 0.0 EC gives you full control, which is why we recommend it for coco grows. Use our nutrient calculator to convert between EC and PPM scales.
When to Add Silica
Silica (potassium silicate) strengthens cell walls, improves heat and drought resistance, and may increase pest resilience. Add it during veg through mid-flower at manufacturer rates. Critical rules:
- Always add silica to water FIRST, before any other nutrients
- Silica raises pH dramatically — pH down will be needed after mixing
- Stop silica supplementation 3–4 weeks before harvest
Best Nutrients for Cannabis in Coco Coir
Any quality hydroponic nutrient line works in coco. Avoid "soil-specific" nutrients — they assume the medium provides micronutrients that coco does not. Popular options that perform well include:
- Two-part systems: Canna Coco A+B, General Hydroponics Flora Duo
- Three-part systems: General Hydroponics Flora Trio (Micro, Grow, Bloom), Advanced Nutrients pH Perfect Trio
- One-part systems: Dyna-Gro Foliage-Pro (veg) and Bloom (flower) — simplest for beginners transitioning from soil
pH Management in Coco Coir: Your 5.8–6.2 Sweet Spot
Cannabis coco coir pH should be maintained between 5.8 and 6.2 in your input solution. This range provides optimal nutrient availability in a soilless medium — slightly higher than pure DWC hydro (5.5–5.8) but notably lower than soil (6.0–6.8). Drifting outside this window by even 0.3 points can trigger visible deficiency symptoms within days.
Why Runoff pH Matters More in Coco Than Soil
Soil has a large natural pH buffering capacity — it resists change. Coco has almost none. This means the pH at your root zone is essentially the pH of your last watering, modified by nutrient uptake and salt accumulation. Testing runoff pH tells you what's actually happening at the roots.
Here's how to use runoff data:
- Runoff pH 5.8–6.2: Root zone is stable. Continue current protocol.
- Runoff pH below 5.5: Root zone is acidifying. This commonly causes iron and manganese toxicity (burnt leaf tips, dark spots). Feed at the higher end of the range (6.2) for 2–3 waterings to correct.
- Runoff pH above 6.5: Root zone is becoming alkaline. Iron and phosphorus begin locking out. Feed at 5.8 for 2–3 waterings. If persistent, a light flush with pH 5.8 water may be needed.
Avoid this common error: Do not chase runoff pH by dramatically adjusting input pH. If your runoff reads 5.2 and you panic-feed at pH 7.0, you'll create a pH roller coaster that stresses roots more than the original drift. Gentle corrections of 0.2–0.3 pH units per watering are safer and more effective.
Runoff EC: The Other Half of the Equation
Always test runoff EC alongside pH. The relationship between input EC and runoff EC reveals whether salts are accumulating or depleting:
- Runoff EC significantly higher than input EC (>0.3 difference): Salt buildup is occurring. Reduce feed strength by 10–20% or run extra runoff volume at next watering.
- Runoff EC close to or lower than input EC: Plants are feeding aggressively. You may be able to increase nutrient concentration slightly.
- Runoff EC spikes suddenly: The medium may be drying out between waterings, concentrating salts. Increase watering frequency.
Common Deficiencies in Coco Coir and How to Fix Them
The most common deficiencies in coco coir are calcium, magnesium, and iron — all directly linked to coco's unique CEC properties and pH sensitivity. Identifying these quickly prevents cascading problems that can slash yields by 20–40%.
Calcium Deficiency (Most Common)
- Symptoms: Irregular brown or rust-colored spots on middle and upper leaves. Leaf edges may curl. New growth appears distorted or stunted.
- Cause in coco: Unbuffered CEC sites absorbing calcium, insufficient cal-mag supplementation, or pH below 5.8.
- Fix: Increase cal-mag to 200–250 PPM for 3–5 waterings. Confirm input pH is 5.8–6.2. Do NOT flush — flushing removes calcium from the medium and worsens the deficiency.
Magnesium Deficiency
- Symptoms: Interveinal chlorosis (yellowing between veins while veins stay green) starting on lower/middle leaves. Often mistaken for nitrogen deficiency.
- Cause in coco: Same CEC absorption issue as calcium. Can also occur when potassium levels are very high (K competes with Mg uptake).
- Fix: Increase cal-mag dose. If using a PK booster, reduce its concentration temporarily to lower potassium competition.
Iron Chlorosis
- Symptoms: Bright yellow or pale new growth at the top of the plant, while lower leaves remain green. Unlike magnesium deficiency, iron deficiency appears on the newest tissue first.
- Cause in coco: Almost always a pH issue. Iron locks out rapidly above pH 6.5 and becomes toxic below 5.5.
- Fix: Correct pH to 5.8–6.0 for the next several waterings. Do not add iron supplements unless you've confirmed pH is correct and deficiency persists. Chelated iron (Fe-DTPA) is effective in the coco pH range.
Diagnostic shortcut: If your cannabis is yellowing in coco coir, check three things in this order: (1) Is your cal-mag at 150+ PPM every feeding? (2) Is your input pH between 5.8–6.2? (3) Is your runoff EC within 0.3 of your input EC? Fixing these three variables resolves 90% of coco deficiency issues without ever needing to flush. Our plant diagnosis tool can help you identify specific symptoms visually.
Flushing Cannabis in Coco Coir: Science vs Tradition
Flushing in coco coir — running plain water or a very low-EC solution through the medium before harvest — is one of the most debated practices in cannabis cultivation. Coco growers have more flexibility than soil growers here, and the honest science suggests the practice is more nuanced than "always flush" or "never flush."
What the Research Shows
A cannabis flushing research study conducted by Rx Green Technologies found that reducing or eliminating nutrients in the final days before harvest did not significantly alter the mineral content of dried flower. Plants naturally mobilize and store nutrients regardless of what's in the root zone during the final week.
However, many experienced coco growers — ourselves included — find that tapering nutrients over the final 7–10 days (rather than a hard 14-day flush) produces a cleaner smoke without sacrificing bud density. The key distinction: this is a gradual taper, not a sudden nutrient cut.
Our Recommended Coco Flush Protocol
Week 8: Begin Taper
Reduce base nutrients to 50% strength. Maintain cal-mag at 100–150 PPM. Continue watering to 15–20% runoff.
Final 3–5 Days: Plain Water
Switch to plain water or water with a light enzyme solution. pH to 5.8–6.0. This is enough time to clear residual salts without starving buds of final ripening nutrients.
Harvest Day: Check Trichomes
Flush timing should be determined by trichome ripeness, not arbitrary calendar days. When 10–20% of trichomes appear amber under magnification, harvest. See our harvest timing guide for detailed trichome analysis.
The real quality factor: Research suggests that proper drying and curing has a far greater impact on smoke quality than pre-harvest flushing. A 10–14 day slow dry at 60°F / 60% RH followed by a 2–4 week cure will do more for flavor than any flushing protocol. Plan your harvest using our grow planner to time the taper correctly.
Best Strains for Coco Coir Growing in 2026
While nearly any cannabis strain can thrive in properly managed coco, certain genetics particularly shine — especially vigorous feeders that can capitalize on coco's rapid nutrient delivery and strains with strong root systems that exploit the aeration advantage.
Fast-Finishing Photoperiods for Coco
These photoperiod strains finish in 8–9 weeks of flower and respond explosively to coco's oxygen-rich root zone:
- Gorilla Glue (GG4): A heavy feeder that thrives at higher EC levels. Expect 25–28% THC and massive resin production in coco. 8–9 week flower time.
- OG Kush Feminized: A coco classic at 26% THC. Responds beautifully to the precise feeding control coco provides. Heavy cal-mag feeder — push to 200 PPM throughout.
- Wedding Cake: Dense, trichome-coated buds that benefit from coco's excellent drainage. 8-week finisher with 24–26% THC potential.
- Northern Lights x Big Bud Feminized: Bred for yield, this 20% THC hybrid develops massive colas in coco. Forgiving of minor pH fluctuations — excellent for coco beginners.
- Sour Diesel Feminized: The sativa-leaning stretch works well in coco's fast-growing environment. 24% THC with a classic fuel-forward profile.
Vigorous Autoflowers for Coco
Autoflowers in coco benefit from the medium's consistent moisture — their compressed timeline leaves no room for recovery from dry-out stress. Use 3-gallon fabric pots for autoflowers rather than 5-gallon:
- Gelato Auto: Compact and frost-heavy, finishing in 70–75 days from seed. 22–24% THC in coco with proper feeding.
- Skywalker OG Autoflower: A 23% THC powerhouse autoflower that produces dense, resinous buds in just 10 weeks from seed. Its indica-dominant structure stays manageable in smaller pots.
- Amnesia Haze Autoflower: For growers wanting sativa effects on an autoflower timeline. 17% THC with strong terpene production in coco.
- Zkittlez Auto: Colorful, terpene-rich buds that develop stunning purple hues when nighttime temperatures drop. 20–22% THC potential in coco.
- Banana Kush Autoflower: A forgiving, vigorous autoflower at 18% THC with a tropical terpene profile that coco's clean medium showcases beautifully.
Confident in your strain choice? Our germination guarantee ensures your seeds arrive viable and ready to plant. For help estimating your potential harvest, try our yield estimator tool.
Putting It All Together: Your Coco Coir Cannabis Growing Checklist
Success with coco coir comes down to nailing a handful of fundamentals and repeating them consistently. Here's the complete workflow condensed into a reference checklist you can use every grow:
- Buffer coco in 300–500 PPM cal-mag solution for 8–24 hours before use
- Mix coco and perlite at 70/30 ratio by volume
- Use fabric pots (5-gallon photoperiods, 3-gallon autoflowers)
- pH every nutrient solution to 5.8–6.2 before watering
- Add cal-mag at 150–200 PPM to every feeding
- Water to 10–20% runoff at every irrigation
- Never let coco dry out completely between waterings
- Test runoff pH and EC weekly — adjust input accordingly
- Follow EC targets: 0.8–1.0 (veg) → 1.4–1.8 (peak flower) → taper to harvest
- Taper nutrients over final 7–10 days rather than hard flush
- Monitor trichomes for harvest timing, not calendar days
- Dial in your environment with our VPD calculator for optimal transpiration
Coco coir rewards precision. Unlike soil, which hides your mistakes behind its buffering capacity, coco gives you honest, immediate feedback. That transparency is what makes it such an effective teaching medium — and why growers who master coco can seamlessly transition to any cultivation method. Whether you're running a single-plant ScrOG setup or scaling to a full tent of topped and trained plants, coco coir gives you the control to push your genetics to their ceiling.
Frequently Asked Questions About Coco Coir Cannabis Growing
How often should I water cannabis in coco coir?
Water cannabis in coco coir every 1–2 days during veg and daily during flower, always to 10–20% runoff. Never let the medium dry completely. Young seedlings need less volume but the same frequency. Large flowering plants in 5-gallon pots may need two irrigations per day, especially under intense lighting. The goal is consistent moisture — not wet-dry cycling like soil.
Why is my cannabis yellowing in coco coir?
The most common cause is calcium or magnesium deficiency from unbuffered coco or insufficient cal-mag supplementation. Coco's cation exchange sites grab these nutrients from your solution, starving the plant even when your feed looks correct. First, confirm you're adding cal-mag at 150–200 PPM every feeding. Then check that input pH is 5.8–6.2 and runoff EC isn't spiking. These three fixes resolve the vast majority of yellowing issues in coco.
Can I reuse coco coir for a second grow?
Yes. After harvest, remove the root ball and large root pieces, then soak the used coco in a fresh cal-mag solution (300–500 PPM) for 8–12 hours to re-buffer the CEC sites. Rinse thoroughly, test runoff EC (should be below 0.3), and re-amend with 10–15% fresh perlite to restore aeration lost from compaction. Coco can typically be reused for 2–3 grows before structure degrades significantly.
Do I need to add cal-mag every watering in coco?
Yes. Unlike soil, which contains natural calcium and magnesium, coco coir provides none — and actively competes for these ions at its CEC sites. Add cal-mag at 150–200 PPM as the first ingredient in every nutrient mix from seedling through late flower. Even pre-buffered coco benefits from consistent supplementation. The only time to reduce cal-mag is during the final flush or taper before harvest.
Is coco coir better than soil for growing cannabis?
Coco typically delivers faster growth (15–25%), larger yields, and fewer pest issues than soil. However, it requires more frequent watering, mandatory pH adjustment at every feeding, and consistent cal-mag supplementation. Soil is more forgiving and better for hands-off growers. Coco is ideal for cultivators ready to manage feeding precision in exchange for hydroponic-level performance. See our hydroponics guide for the full spectrum of growing methods.
Sources & References
This article was researched and fact-checked using 6 verified sources including 2 industry sources, 4 community resources.
- How to Grow Cannabis with Coco Coir | Grow Weed Easy — growweedeasy.com [Industry]
- Growing Cannabis In Coco Coir Or Peat Moss - RQS Blog — royalqueenseeds.com [Industry]
- How to grow cannabis in coco coir? – The Coco Depot — thecocodepot.com [Community]
- Best Practices for Cannabis Growing with Coco Coir I Rx Green — rxgreentechnologies.com [Community]
- Growing Weed in Hydroponic System - Mediums for Cannabis in Coco Coir | Hydroponic Supplies — riococo-mmj.com [Community]
- How to Grow Cannabis Using Coco Coir — leafwell.com [Community]