Picture this: you just trimmed, dried, and jarred a beautiful cannabis harvest. Instead of waiting another four to six months before your next batch is ready, a fresh set of plants is already deep into flower — just weeks away from the chop. That is the power of a perpetual harvest cannabis setup, and it is the single most effective way to keep your jars full year-round without scaling up to a warehouse.
In over 15 years of indoor cannabis cultivation, we have found that switching from single-run grows to a perpetual cycle was the biggest quality-of-life upgrade we ever made. This guide covers every logistical detail — tent sizing, light schedules, plant counts, harvest calendars, and the autoflower vs photoperiod debate — so you can build your own continuous cannabis harvest system at home in 2026.
What Is a Perpetual Harvest Cannabis Setup?
A perpetual harvest cannabis setup staggers vegetative and flowering cycles so that one batch of plants is always maturing while the next batch grows. Instead of harvesting once or twice per year, you harvest every 4 to 10 weeks depending on strain and method.
The concept is simple: separate your grow into at least two overlapping timelines. While Plants A finish flowering, Plants B are vegging. The day you chop Plants A, Plants B move into the flower space, and you start Plants C from seed or clone. Repeat indefinitely.
The Math Behind Perpetual Growing
A single-run grower using a strain with 8 weeks of veg and 8 weeks of flower completes one cycle in roughly 4 months — about 3 harvests per year from one tent, if they turn around quickly. A perpetual grower with two tents running the same strain harvests every 8 weeks once established, yielding 6 or more harvests per year from the same flower footprint.
As detailed in Grow Weed Easy's perpetual harvest guide, this technique ensures "a cannabis harvest every 2 months" once the rhythm is dialed in. The Royal Queen Seeds blog similarly notes that perpetual growing can produce "6 harvests per year" with contemporary 8-week hybrids.
Key Takeaway: Perpetual harvest is not about growing more plants simultaneously — it is about overlapping cycles so your flower tent never sits empty. The result is 4–6× more annual yield from the same square footage.
Why Perpetual Harvest Matters for Home Growers
Beyond raw yield, there are two critical advantages:
- Supply consistency: You never face a dry spell between harvests. Fresh cannabis is always weeks away, not months.
- Disaster insurance: If pests, mold, or a nutrient mistake destroys your flowering plants, replacement plants are already vegging. You lose weeks instead of an entire grow cycle.
- Strain variety: Running overlapping cycles lets you grow 6–12 different strains per year, dialing in what works best for your setup and preferences.
Two Core Methods: Photoperiod Two-Tent vs Autoflower Single-Tent
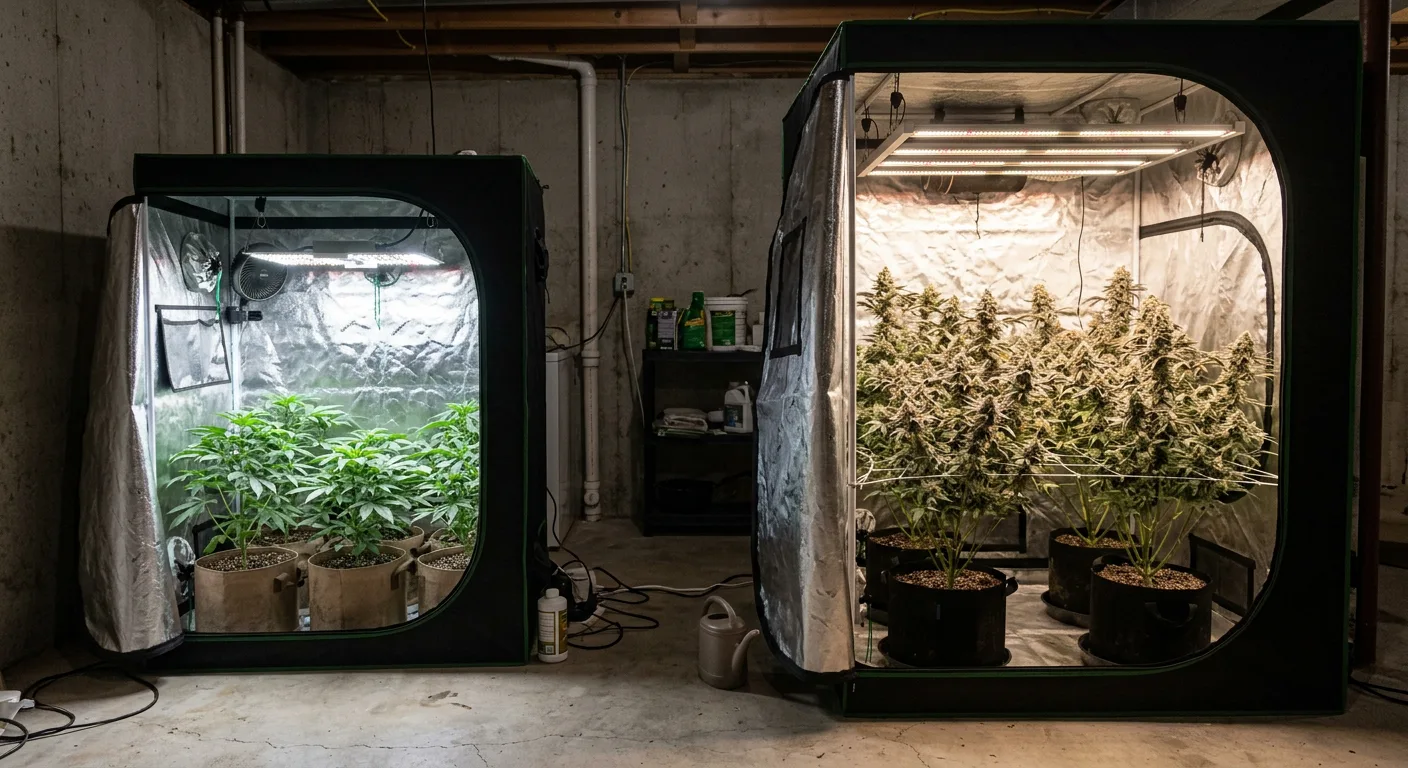
There are two primary approaches to building a perpetual cannabis grow setup: a two-tent photoperiod system with separate veg and flower spaces, or a single-tent autoflower rotation. Each has clear trade-offs in cost, complexity, and flexibility.
| Factor | Two-Tent Photoperiod | Single-Tent Autoflower |
|---|---|---|
| Spaces needed | 2 (veg tent + flower tent) | 1 tent |
| Light schedules | 18/6 veg, 12/12 flower (independent) | 18/6 or 20/4 throughout |
| Harvest frequency | Every 8–10 weeks | Every 3–4 weeks (staggered) |
| Strain control | Clone or seed; can keep mothers | Seed-only each cycle |
| Setup cost | Higher (2 tents, 2 lights) | Lower (1 tent, 1 light) |
| Canopy management | Easier — same-stage plants | Harder — mixed heights |
| Yield potential per cycle | Higher (longer veg = bigger plants) | Moderate (auto genetics limit size) |
| Best for | Dedicated growers, clone runs, max yield | Beginners, limited space, variety seekers |
Most experienced perpetual growers choose the two-tent photoperiod method for maximum control and yield. However, autoflower perpetual setups have improved dramatically as auto genetics have caught up with photoperiod strains in potency and yield. We will cover both methods in full detail below.
Pro Tip: Not sure which approach fits your space? Use our free grow planner tool to model tent sizes, plant counts, and harvest timelines before you invest in equipment.
The Two-Tent Photoperiod Setup in Detail
The two-tent photoperiod perpetual cannabis grow setup is the gold standard for home cultivators who want maximum yield and genetic consistency. Here is exactly how to build one from scratch.
Tent Sizing Recommendations
Your flower tent should be your largest space — this is where plants spend the most time and need the most light. Your veg tent can be significantly smaller because vegetative plants are compact and need less intense lighting.
- Budget setup: 2×4 veg tent + 4×4 flower tent (fits 2–4 plants per stage)
- Standard setup: 3×3 veg tent + 4×4 flower tent (comfortable room for 4 plants per stage)
- High-yield setup: 4×4 veg tent + 4×8 flower tent (6–8 plants per stage, ideal for ScrOG training)
Lighting Configuration
Each tent runs independently on its own timer — this is non-negotiable for photoperiod perpetual grows.
Veg Tent: 18/6 Light Schedule
Run your veg tent at 18 hours on, 6 hours off. A 150–250W LED or T5 fluorescent is sufficient for a 2×4 to 3×3 space. Vegetative plants do not need intense light — they need consistent, blue-spectrum lighting to build strong structure.
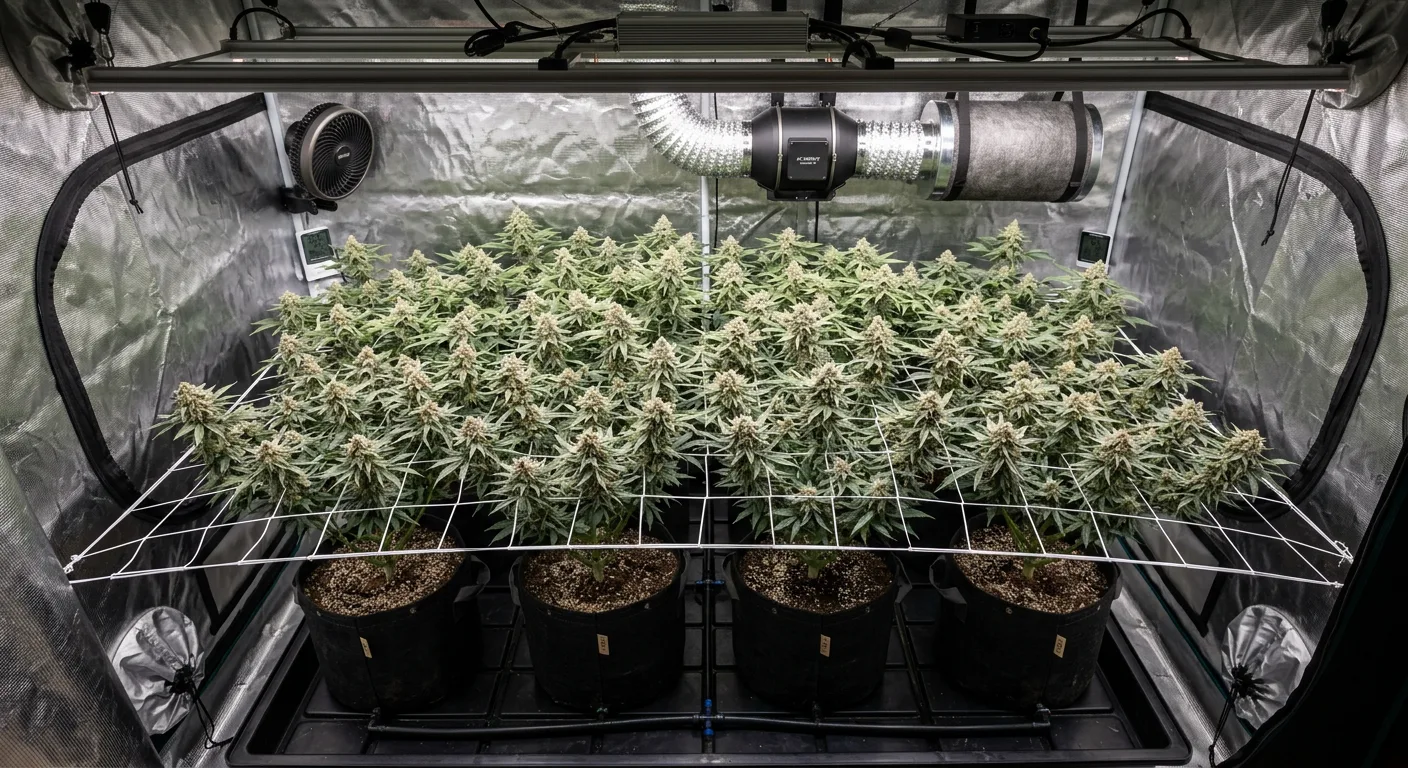
Flower Tent: 12/12 Light Schedule
Run your flower tent at 12 hours on, 12 hours off. This is where you invest in powerful lighting — 400–600W of quality LED for a 4×4 tent, or 600–800W for a 4×8. Light intensity directly determines bud density and yield. Use our light calculator to match wattage to your flower tent size.
Environment Control: Independent Climate
Each tent needs its own ventilation, carbon filter, and temperature/humidity monitoring. Veg plants thrive at 70–80°F with 55–65% RH. Flowering plants perform best at 68–78°F with 40–50% RH during late flower. Dial these in with our VPD calculator.
How Many Plants to Run at Each Stage
For most home growers operating under personal cultivation limits, we recommend:
- Veg tent: 2–4 plants (plus 1 mother plant if using clones)
- Flower tent: 2–4 plants occupying the full canopy
- Total plant count: 4–8 active plants at any time
This count assumes you are training plants to fill the canopy using techniques like topping and LST. Fewer well-trained plants will out-yield many untrained plants in the same space.
Important: Always check your local cultivation laws before setting up a perpetual grow. Some jurisdictions limit total plant counts regardless of growth stage. Our legalization map can help you verify limits in your area.
Source Material: Seeds, Clones, or Mother Plants
You have three options for starting each new cycle:
- Seed-based perpetual: Pop new seeds every cycle. Most variety, but introduces pheno variation and ongoing seed cost. Good for growers exploring different genetics.
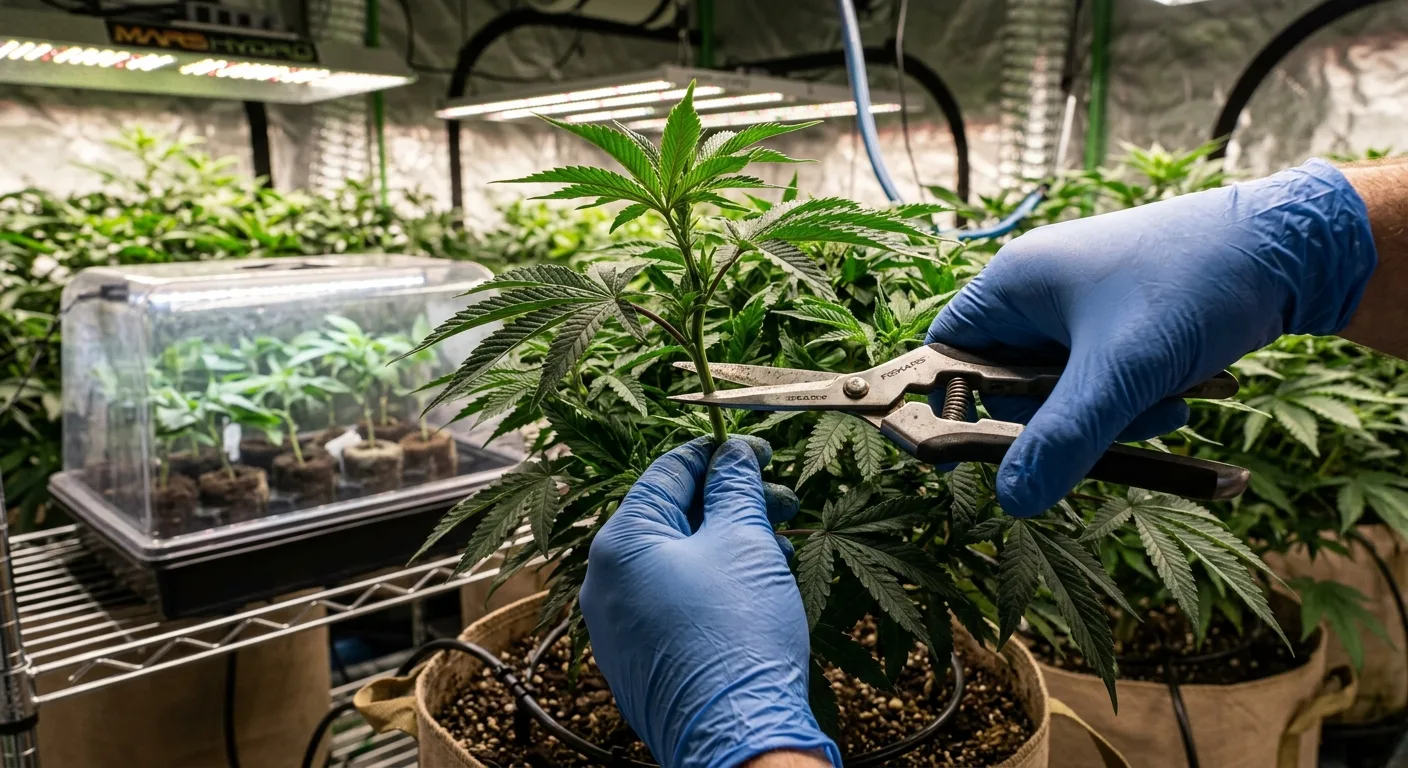
- Clone-based perpetual: Maintain a mother plant and take cuttings each cycle. Best for genetic consistency and eliminating seed costs after initial purchase. (We cover this in depth below.)
- Seed-to-clone hybrid: Start from seed, select your best phenotype, then keep her as a mother for future cycles. This is the approach we recommend for most home growers.
Building Your Perpetual Harvest Calendar: Timing and Scheduling
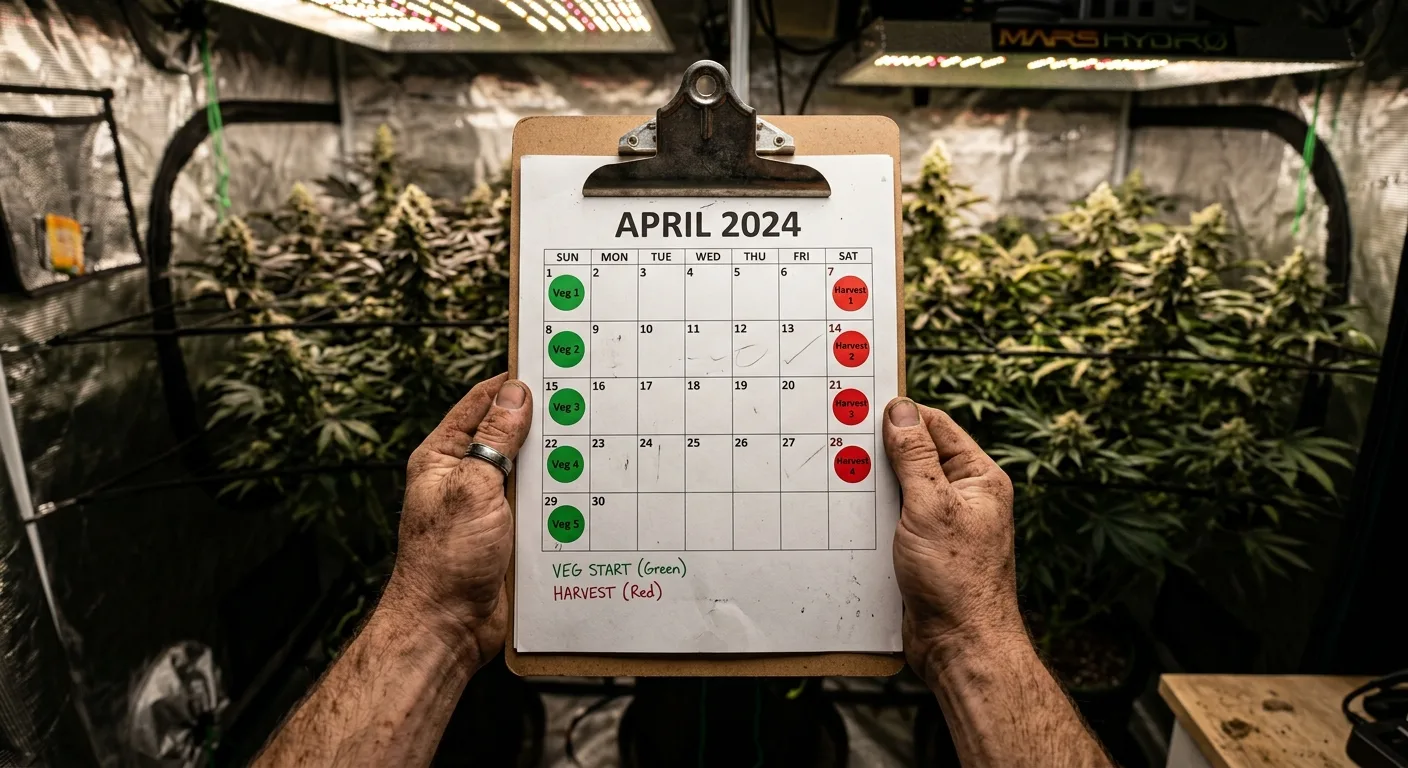
The key to cannabis perpetual grow cycle planning is synchronizing your veg and flower timelines so that the day you harvest, your next batch is ready to flip. The ideal flowering time for perpetual growing is 8 weeks, as noted by multiple experienced growing sources including GrowWeedEasy and the RQS cultivation blog.
The 8-Week Cycle Framework
If your chosen strain flowers in approximately 8 weeks and you veg plants for 8 weeks, the math becomes clean and predictable:
Week 0 — Cycle Start
Germinate seeds or take clones for Batch A. Place them in the veg tent under 18/6 lighting. If your flower tent is empty (first run), you are simply building your pipeline.
Week 8 — First Flip
Batch A has vegged for 8 weeks and reached roughly half its desired final height. Move Batch A into the flower tent and switch to 12/12. On the same day, start Batch B (seeds or clones) in the veg tent.
Week 16 — First Harvest + Second Flip
Batch A finishes 8 weeks of flower. Harvest, trim, and begin drying. Move Batch B (now 8 weeks vegged) into the flower tent. Start Batch C in the veg tent. The cycle is now fully established.
Week 24 — Second Harvest + Third Flip
Batch B is harvested. Batch C moves to flower. Batch D starts in veg. You have now harvested twice in 6 months and have a third batch already in flower.
Six-Month Visual Calendar Example
| Week | Veg Tent | Flower Tent | Action |
|---|---|---|---|
| 0 | Batch A starts | Empty | Germinate / clone |
| 4 | Batch A mid-veg | Empty | Top and train |
| 8 | Batch B starts | Batch A flips to 12/12 | Move A → flower, start B |
| 12 | Batch B mid-veg | Batch A mid-flower | Top and train B |
| 16 | Batch C starts | Batch B flips to 12/12 | 🌿 Harvest A, move B → flower, start C |
| 20 | Batch C mid-veg | Batch B mid-flower | Top and train C |
| 24 | Batch D starts | Batch C flips to 12/12 | 🌿 Harvest B, move C → flower, start D |
Pro Tip: Choose strains with a known 8-week flowering period for your first perpetual cycle. Strains like Northern Lights x Big Bud (20% THC), White Widow (25% THC), or classic Northern Lights finish reliably in 56–60 days and are forgiving of timing miscalculations.
Adjusting for Longer-Flowering Strains
Not all strains finish in 8 weeks. Sativa-dominant hybrids and Haze varieties often need 10–12 weeks of flower. As the Royal Queen Seeds blog notes, "if you do want to grow longer-maturing sativas like the Hazes, the harvest frequency drops to 4 per year because of the 12-week flowering time."
If you grow a 10-week strain, simply veg the next batch for 10 weeks instead of 8. The cycle stretches but remains synchronized. For a 12-week strain like Super Lemon Haze (23% THC), veg each batch for 12 weeks — this also means bigger plants and potentially larger individual harvests, though fewer per year.
Key Takeaway: Match your veg time to your flower time. If a strain takes N weeks to flower, veg the next batch for N weeks. Start each new batch the same day you flip the previous one. This single rule keeps the entire system synchronized.
Autoflower Perpetual Harvest: One Tent, Multiple Stages
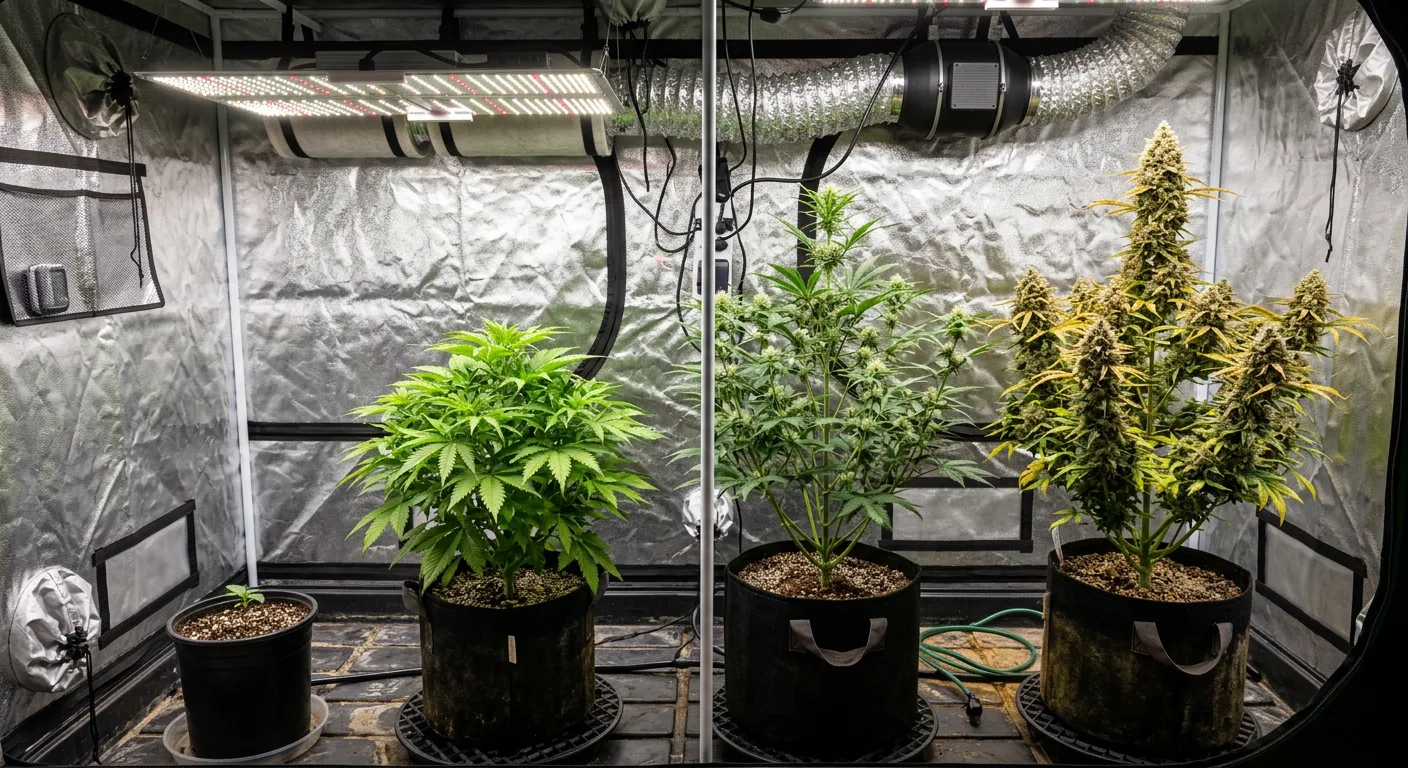
An autoflower perpetual harvest runs entirely in one tent under a single light schedule — typically 18/6 or 20/4 — because autoflowering strains begin flowering based on age rather than light cycle changes. This eliminates the need for a second tent, making it the most accessible perpetual method.
Why Autoflowers Simplify Perpetual Growing
Photoperiod perpetual setups require strict light separation between veg and flower spaces. Even a tiny light leak during the dark period can reveg flowering plants or cause hermaphroditism. Autoflowers bypass this entirely — you can have seedlings, vegging plants, and flowering plants all under the same light with zero issues.
Modern autoflower genetics have closed the gap with photoperiod strains in both potency and yield. Strains like Gorilla Glue Auto (up to 26% THC), Wedding Cake Auto, and Skywalker OG Auto (23% THC) produce dense, potent buds in 70–85 days from seed.
Staggering Seed Starts Every 3–4 Weeks
Week 0: Germinate Plant 1
Start your first autoflower seed. Place in final pot (3–5 gallon fabric pot recommended — autoflowers do not transplant well). Begin under 18/6 or 20/4 lighting in your single tent.
Week 3–4: Germinate Plant 2
Start your second seed. Plant 1 is now in active vegetative growth, likely showing its first sets of true leaves and branching. Both plants share the same tent and light schedule.
Week 6–8: Germinate Plant 3
Start your third seed. Plant 1 is now entering pre-flower or early flower. Plant 2 is in mid-veg. You now have three life stages coexisting in one space.
Week 10–12: Harvest Plant 1, Germinate Plant 4
Plant 1 finishes around day 70–85. Harvest it, and start a new seed in the freed-up space. The cycle is now self-sustaining — you harvest one plant and start one plant every 3–4 weeks.
Canopy Management Challenges
The biggest difficulty with autoflower perpetual setups is managing different plant heights under one light. A seedling needs the light much closer or dimmer, while a mature flowering plant needs maximum intensity.
Practical solutions include:
- Raise smaller plants on risers (overturned pots, crates) to bring them closer to the light canopy
- Use a dimmable LED set for the flowering plants, and supplement seedlings with a small secondary light if needed
- Choose strains with similar mature heights to reduce extreme canopy variation
- LST aggressively on taller plants to keep the canopy even — our FIMming guide covers high-yield training techniques
Expert Note: GrowWeedEasy recommends choosing "auto-flowering strains with relatively short lifespans — under 80 days if possible — because longer-flowering plants tend to get huge and overtake the grow space." We agree: compact autoflowers like Holy Grail Kush Auto (20% THC) and Banana Kush Auto (18% THC) are ideal for single-tent perpetual rotations.
Recommended Autoflower Strains for Perpetual Harvest
When selecting autos for a perpetual setup, prioritize fast finishing times (under 80 days), compact structure, and consistent genetics. Here are our top picks mixing well-known industry favorites with proven performers:
- Gorilla Glue Auto — Up to 26% THC, 70–80 days, heavy resin production
- Do Si Dos Auto — Over 25% THC, compact structure, great for limited space
- Skywalker OG Auto — 23% THC, 75–85 days, dense indica-dominant buds
- Girl Scout Cookies Auto — Up to 25% THC, manageable height, fast finisher
- Amnesia Haze Auto — 17% THC, sativa effects, energetic daytime strain for variety
- Swiss Cheese Auto — 17% THC, very fast 70-day cycle, excellent for rapid turnover
Clone-Based Perpetual Harvest: The Mother Plant Advantage
A clone-based perpetual harvest uses a single mother plant to supply free, genetically identical cuttings for every cycle. This eliminates seed costs after your initial purchase and guarantees consistent phenotype expression — same growth pattern, same potency, same flowering time, every single run.
Setting Up and Maintaining a Mother Plant
Your mother plant lives permanently in the veg tent under 18/6 lighting. She never flowers — her sole job is producing healthy branch tips for cloning.
- Choose your best phenotype: Grow several seeds of a strain, flower them all, and select the standout performer. Revegetate her or, better yet, take clones before you flip and keep one in veg as a backup.
- Container size: A 5–7 gallon pot is ideal. Too small and the mother becomes rootbound quickly; too large and she grows unmanageably big.
- Feeding: Use a mild vegetative nutrient formula at 50–75% strength. Mothers do not need heavy feeding — they just need to stay healthy and produce vigorous growth tips. Our nutrient calculator can help you dial in ratios.
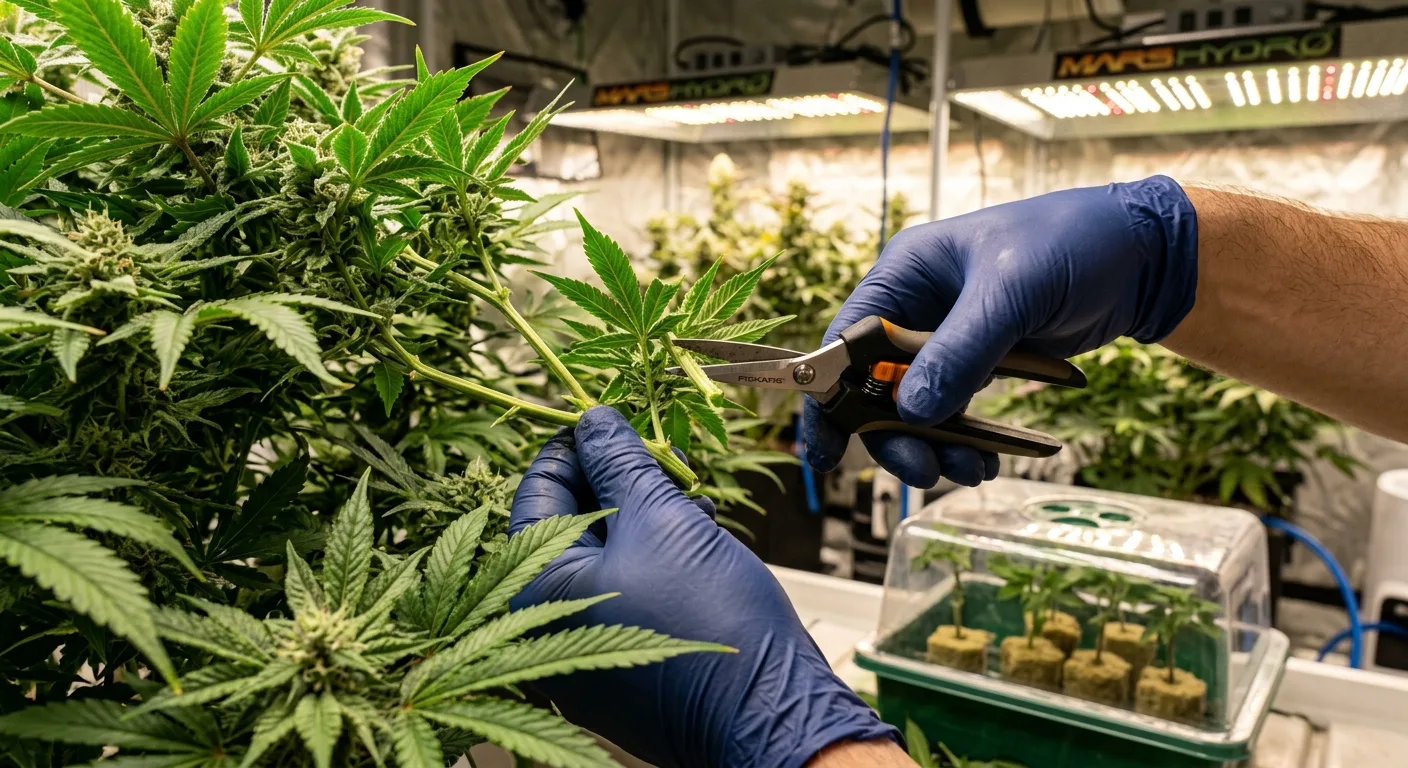
- Pruning schedule: Every 3–4 weeks, take 4–8 cuttings from the mother's newest growth. This simultaneously supplies your next batch and keeps the mother compact and bushy through regular pruning.
Cloning Every 3–4 Weeks
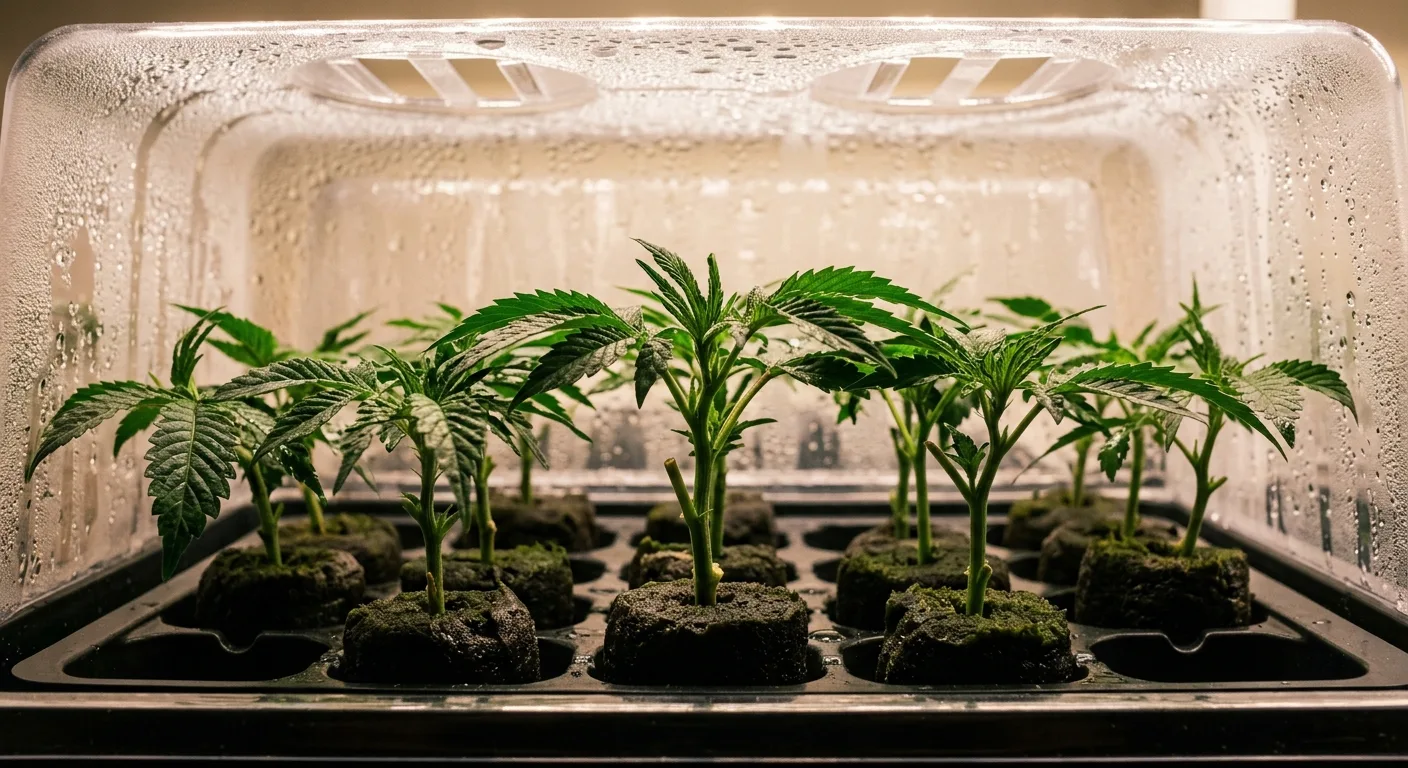
Take cuttings 10–14 days before you plan to flip the previous batch to flower. This gives clones time to root (7–14 days) and begin active vegetative growth before they need to fill the veg tent. Most clones root reliably in a simple humidity dome with rooting gel and starter plugs.
Once rooted, clones get 4–8 weeks of vegetative growth depending on your target plant size and flowering time. Because clones are already mature tissue (not seedlings), they often grow faster than seed starts during early veg.
Key Takeaway: A single mother plant can supply clones indefinitely — some growers maintain mothers for 2+ years. This makes clone-based perpetual harvest the most cost-effective long-term strategy, especially if you find a phenotype you love.
Best Strains for Mother Plant Selection
Ideal mother plant candidates are vigorous vegetative growers with reliable 8-week flower times and proven genetics. We recommend keeping 2–3 mothers of different strains for variety:
- Wedding Cake — 25% THC, vigorous grower, dense buds, industry favorite
- Gelato — 22–25% THC, exceptional terpene profile, manageable stretch
- OG Kush — 26% THC, legendary genetics, strong cloning response
- Purple Kush — 27% THC, pure indica, very consistent phenos
- Zkittlez — 20–23% THC, fruity terpenes, compact branchy structure perfect for cloning
- Cookies Kush — 18% THC, excellent yields, robust mother plant vigor
Explore our full strain catalog to find feminized seeds for your first mother plant selection grow. All our seeds come with a germination guarantee, giving you confidence when selecting genetics for a long-term perpetual program.
Cannabis Perpetual Grow Room Layout: 4×4 and 4×8 Options
Your physical room layout determines how efficiently you can move plants between stages, manage airflow, and access each tent for maintenance. Here are two proven layouts we have used and recommend for home perpetual cannabis grows.
Layout A: The Bedroom Setup (2×4 + 4×4)
This fits comfortably in a spare bedroom, large closet, or basement corner. Total footprint: approximately 6×4 feet plus working space.
- Veg tent (2×4): Positioned along one wall. Houses 2–3 vegging plants plus 1 mother plant. Runs a 150–200W LED or T5 fixture on 18/6.
- Flower tent (4×4): Adjacent to the veg tent with a 2-foot gap for airflow and access. Houses 3–4 flowering plants under a 400–480W LED on 12/12.
- Drying area: Use the veg tent during its lighter-load periods, or dedicate a small drying rack in a closet nearby. Target 60°F and 60% RH for 10–14 days — see our harvest timing guide for optimal drying techniques.
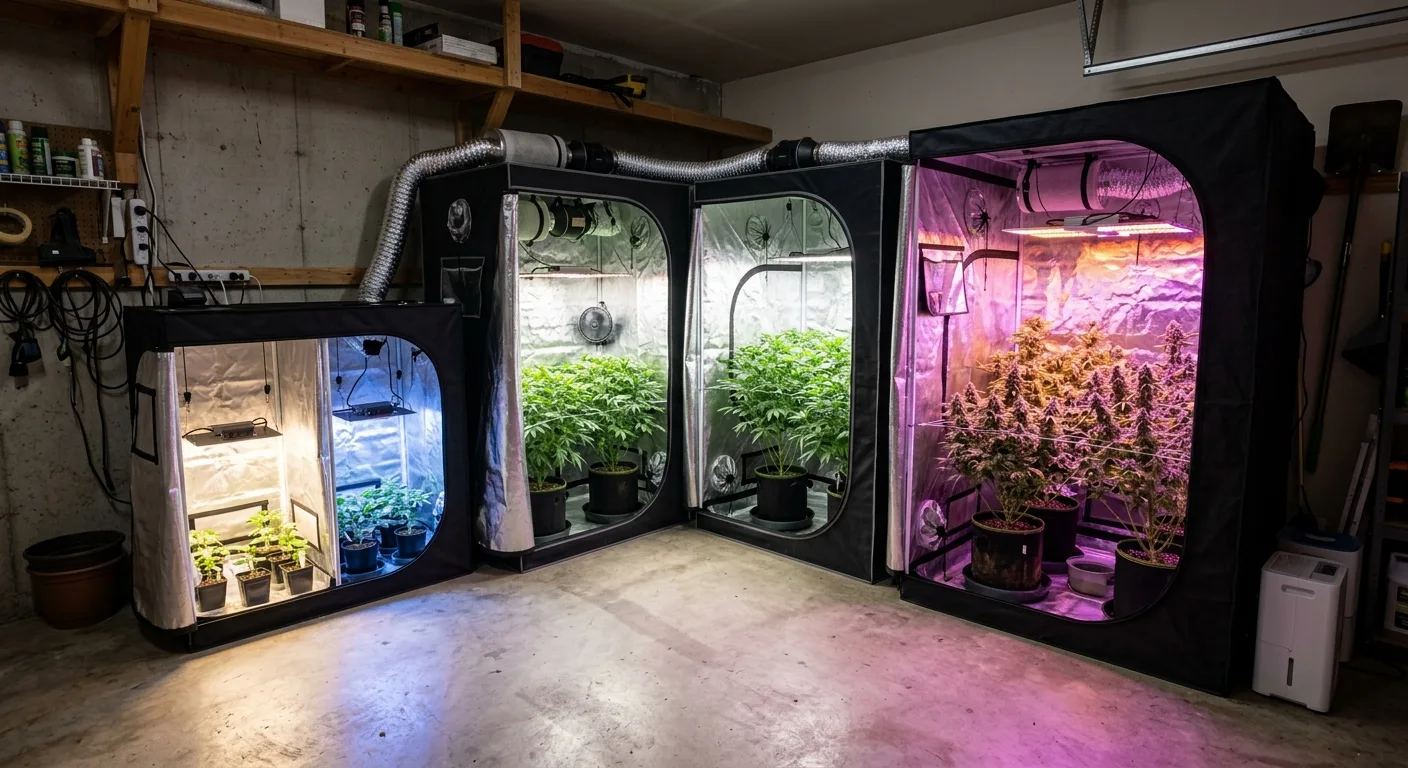
Layout B: The Garage Setup (4×4 + 4×8)
This layout maximizes yield and is ideal for growers with more space and larger plant count limits.
- Veg tent (4×4): Houses 4–6 vegging plants, 1–2 mother plants, and a small clone shelf. Runs 200–300W LED on 18/6.
- Flower tent (4×8): Fits 6–8 flowering plants in two rows. Requires 600–800W of LED lighting. A 4×8 tent is essentially two 4×4 footprints, so you can run two separate ScrOG screens if desired.
- Dedicated drying tent: At this scale, a small 2×2 or 2×4 drying tent with controlled humidity is worth the investment. It prevents you from needing to hang wet plants inside either grow tent.
Pro Tip: Always position your flower tent's dark period during the hottest hours of your day (typically afternoon). This keeps flower tent temps lower during lights-off and reduces HVAC costs. Stagger your veg and flower light schedules so they are not both running peak wattage simultaneously — this flattens your electricity demand.
Scaling Up: Adding a Third Space and Small Commercial Rotations
Once you master the two-tent perpetual cannabis grow setup, adding a third dedicated space unlocks even faster harvest frequency and better specialization. This is where home grows begin to approach small commercial efficiency.
The Three-Tent System
- Tent 1 — Clone/Seedling tent (2×2 or 2×4): Houses mother plants, fresh clones in a humidity dome, and seedlings in their first 2–3 weeks. Low-intensity lighting (50–100W LED or T5), high humidity.
- Tent 2 — Vegetative tent (3×3 or 4×4): Plants move here once rooted and established. They receive 18/6 light and aggressive training (topping, LST, ScrOG prep) for 4–6 weeks.
- Tent 3 — Flower tent (4×4 or 4×8): Full-intensity 12/12 flowering. Plants spend 8–10 weeks here before harvest.
With three spaces, you can flip plants to flower every 4–5 weeks instead of every 8, because the dedicated clone tent frees up veg space faster. This effectively doubles your harvest frequency compared to a two-tent setup.
Small-Scale Commercial Rotation Logic
Small licensed operations often run what is called a "rolling flower" system. A common model uses a 12-light flower room divided into 3 or 4 zones, with each zone on a different week of flower. Every 2–3 weeks, the oldest zone is harvested and replanted.
Home growers can simulate this at a smaller scale by dividing a 4×8 flower tent into two halves. Flip one half to flower, then flip the second half 4 weeks later. You harvest every 4 weeks instead of every 8. This requires careful light management — using an opaque divider to create separate 12/12 zones — but some growers find it worthwhile.
For the ultimate perpetual system at home, a hydroponic setup can accelerate vegetative growth dramatically. As noted in GrowWeedEasy's guide, "DWC/Bubbleponics growers" may need to stagger differently because their plants "can get GIGANTIC" in 8 weeks of veg. Our complete hydroponics guide covers setup details for DWC and recirculating systems that pair well with perpetual schedules.
8 Common Perpetual Harvest Mistakes (and How to Avoid Them)
A perpetual harvest cannabis system delivers incredible results when executed well — but it has more moving parts than a single-run grow. These are the mistakes we see most often from growers transitioning to perpetual cycles.
1. Light Leaks Between Veg and Flower Spaces
This is the number-one perpetual grow killer. Even brief light exposure during the flower tent's dark period can cause revegetation, hermaphroditism, or delayed maturity. If your tents share a room, ensure zippers are fully closed, use light-trap ducting, and never open the flower tent during its dark hours.
Warning: A green headlamp is NOT safe during the dark period despite common myths. Research suggests even green light at sufficient intensity can disrupt flowering. If you must inspect flowering plants during dark hours, limit exposure to under 1 minute with the dimmest possible green light.
2. Not Matching Veg Time to Flower Time
If your strain takes 10 weeks to flower but you only veg for 8 weeks, your veg plants will be ready to move before the flower tent is empty. This creates a bottleneck. Always select your veg duration to match your expected flowering duration.
3. Underestimating Labor and Harvest Overlap
Harvest week is the most labor-intensive period — trimming, drying, and curing demand hours of work. In a perpetual system, you are harvesting while simultaneously flipping the next batch and possibly taking new clones. Plan harvest days when you have a full day available, and keep your curing and storage supplies organized in advance.
4. Running Too Many Strains with Different Flower Times
If Batch A is a 7-week strain and Batch B is an 11-week strain, your schedule becomes chaotic. For your first several perpetual cycles, stick to one or two strains with similar flowering periods. Add variety gradually as you master the timing.
5. Neglecting the Veg Tent
It is easy to obsess over flowering plants (they are producing your harvest, after all) and neglect veg plants. But under-vegged, under-trained plants produce disappointing flower yields. Dedicate at least 15–20 minutes daily to your veg tent — training, feeding, and monitoring for issues.
6. Skipping the Transition Clean
Every time you empty your flower tent for harvest, clean and sanitize it before moving the next batch in. This prevents pathogen buildup across successive cycles. Wipe down tent walls, sanitize saucers, and check for pest eggs. The RQS blog emphasizes this as critical for multi-cycle success.
7. No Backup Seeds or Clones
If your mother plant dies or your clones fail to root, your perpetual pipeline breaks. Always keep backup seeds stored properly — our seed storage guide covers long-term preservation. Alternatively, maintain two mother plants for redundancy.
8. Ignoring Pest and Disease Spread Between Tents
In a perpetual setup, pests or pathogens in one tent can quickly spread to the other since you are constantly moving plants. Always inspect plants before moving them from veg to flower. Our mold prevention guide covers the airflow and humidity strategies that keep perpetual grows healthy.
Your Perpetual Harvest Checklist: Everything You Need to Start
Before you launch your first perpetual cannabis grow, make sure you have every essential item organized and ready. A perpetual system is only as reliable as its planning.
- Two grow tents (or one tent for autoflower method) properly sized for your plant count
- Two independent lighting systems with separate timers — never run veg and flower on the same circuit timer
- Two ventilation systems with carbon filters for odor control in each tent
- Temperature and humidity monitors in each tent (ideally with data logging)
- Seeds or mother plant ready for cloning — start with proven 8-week flowering strains
- Clone supplies if using mother plants: rooting gel, starter plugs, humidity dome
- Training supplies: plant ties, ScrOG netting, bamboo stakes
- Harvest supplies: trimming scissors, drying rack or line, humidity packs for curing jars
- A written schedule: mark flip dates, expected harvest dates, and clone-cutting dates on a calendar
- Backup seeds stored in a cool, dark place as insurance against pipeline disruptions
Key Takeaway: The difference between a smooth perpetual harvest and a chaotic one is planning. Write your schedule down, set calendar reminders for every flip and clone day, and keep backup genetics on hand. Once the rhythm is established, it becomes second nature.
Frequently Asked Questions About Perpetual Cannabis Harvests
How long between harvests in a perpetual cannabis grow?
In a well-timed two-tent photoperiod setup, you harvest every 8 to 10 weeks, matching your strain's flowering period. With autoflowers in a single tent, you can stagger starts every 3 to 4 weeks and harvest one plant approximately every 3 to 4 weeks once the cycle is fully established — typically after 10 to 12 weeks from your first germination.
How many plants do I need for a perpetual cannabis harvest?
Most home growers run 4 to 8 plants total in a perpetual system — half in the vegetative stage and half in the flowering stage at any given time. A typical two-tent setup keeps 2 to 4 plants vegging in a 2×4 tent while 2 to 4 plants flower in a 4×4 tent. Add 1 mother plant if you are running a clone-based system.
Is a perpetual harvest better with autoflowers or photoperiods?
Photoperiod strains in a two-tent setup offer higher per-cycle yields, genetic consistency through cloning, and more control over plant size. Autoflowers in a single tent are simpler, cheaper to set up, and better for growers with limited space. For maximum yield and long-term cost efficiency, we recommend photoperiods. For simplicity and variety, autoflowers are excellent. See our full comparison table above.
Can I run a perpetual harvest with autoflowers in one tent?
Yes. Since autoflowers flower based on age rather than light schedule, you can grow plants at different life stages in the same tent under 18 to 20 hours of light. Plant a new seed every 3 to 4 weeks and harvest the oldest plant when it matures around 70 to 85 days. The main challenge is managing different heights under one light — use risers, LST, and dimmable LEDs to compensate.
Do I need a mother plant for perpetual harvest?
A mother plant is optional but strongly recommended for long-term perpetual grows. She provides free, genetically identical clones every cycle, eliminating seed costs and ensuring consistent results. Keep her in your veg tent under 18/6 lighting in a 5 to 7 gallon pot, and prune her every 3 to 4 weeks when taking cuttings. Some growers maintain the same mother for years.
Sources & References
This article was researched and fact-checked using 8 verified sources including 4 industry sources, 4 community resources.
- The Perpetual Harvest: How to Grow Unlimited Weed! — growweedeasy.com [Industry]
- Perpetual Harvest Method: Ensure Multiple Harvests Of Ripe Buds Per Year - RQS Blog — royalqueenseeds.com [Industry]
- How to Never Run Out of Weed (The Perpetual Harvest) | Grow Weed Easy — growweedeasy.com [Industry]
- Perpetual Harvest Method: Ensure Multiple Harvests Of Ripe Buds Per Year - RQS Blog — royalqueenseeds.com [Industry]
- Perpetual Harvesting for a Constant Supply of Fresh Buds - MOSCA SEEDS — moscaseeds.com [Community]
- Ultimate Guide On How To Maintain A Perpetual Harvest | 42 Fast Buds — 2fast4buds.com [Community]
- Perpetual Cannabis Harvest – Business Plan Templates — cannabusinessplans.com [Community]
- Cantrak’s Guide to Perpetual Harvesting | by Shivek Sachdev | Medium — medium.com [Community]